Excel Formatting Shortcuts
Written by
Reviewed by
In this tutorial…
Format Cells Dialog Box
General Formatting Shortcuts
Alignment Shortcuts
Font Shortcuts
Number Format Shortcuts
Border Shortcuts
Format Cells Dialog Box
Open Format Cells Dialog Box
This Excel shortcut opens the Format Cells dialog box, to the Number tab or the tab you used most recently.
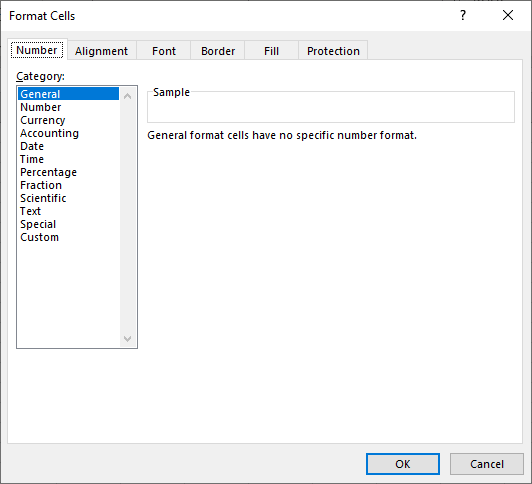
General
Paste Format
This Excel shortcut copies the formatting from one cell and pastes it into another cell.
- Select the cell that contains formatted text and press CTRL + C to copy the cell.
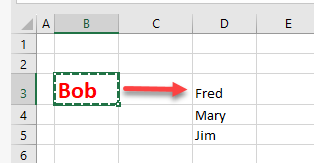
- Then, select the cell where you want to paste the formatting from the first cell and press CTRL + ALT + V to open the Paste Special dialog box. Press T for Formats.
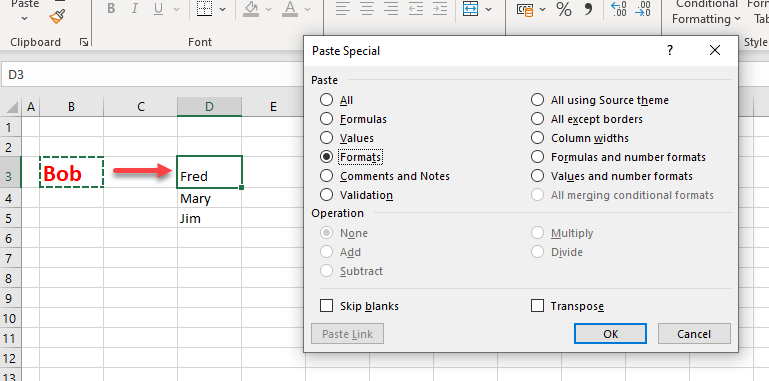
- Press ENTER on the keyboard to apply the original cell’s formatting to the selected cell.
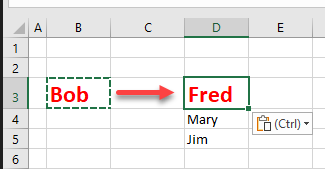
Repeat Previous Format
This Excel shortcut repeats the previous formatting you applied.
- After applying formatting to one cell, select another cell where you want the same formatting.
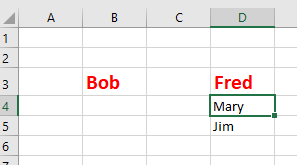
- Press F4 (or CTRL + Y on a Mac) to repeat the format most recently applied.
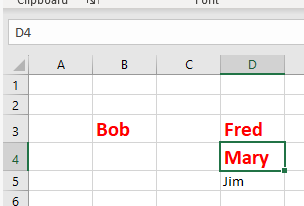
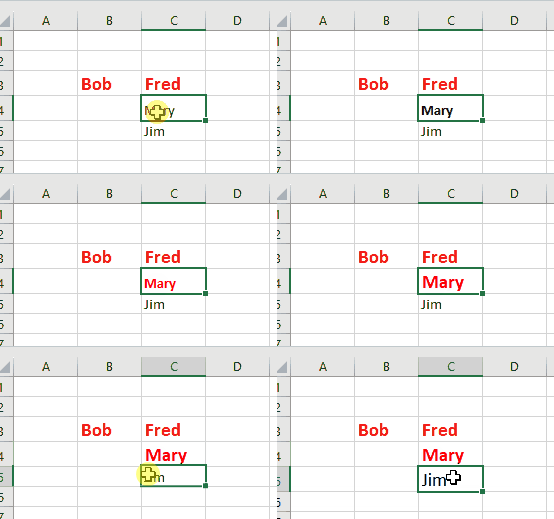
If there are multiple formatting elements applied to the original cell, the F4 shortcut does not work the same way as CTRL + ALT + V > T > ENTER; instead, only the last format change is repeated. Below, see how using F4 to repeat the last formatting change only changes the font size in Cell C5 (Jim) even though multiple format changes were made to C4 (Mary).
Fill Color
This Excel shortcut lets you choose a fill color.
- Press ALT + H. This moves the cursor up to the Ribbon (Home tab). Press H to show the fill color drop down.
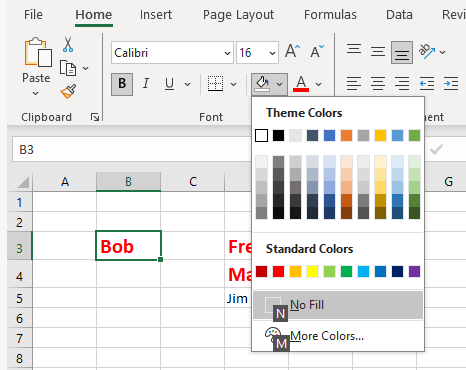
- Use the arrow keys to move to the fill color you want. Or, press M (for More colors) or N (for None).
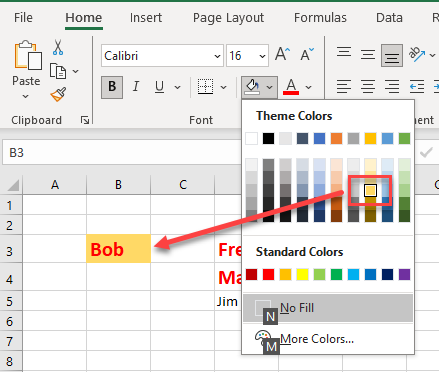
- Once you have chosen a color, press ENTER.
Clear Cell Formatting
This Excel shortcut clears all formatting.
- Select the cell or cells you want to clear the formatting.
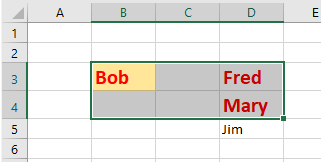
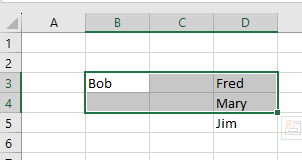
- Press ALT + H to activate the Home tab on the Ribbon. Press E, then F (Clear Formats).

This clears all formatting from the selected cells, leaving the contents unchanged.
Alignment
Wrap Text
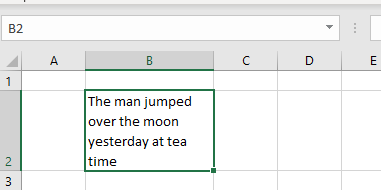
This Excel shortcut turns on text wrapping.
- Select the text you want to wrap and display on multiple lines.

- Press ALT +H to activate the Home tab on the Ribbon, and then press W.
Merge Cells
This Excel shortcut merges selected cells together. Be careful: When cells are merged, Excel only keeps the data contained in the top-left cell. If you have data in any of the other cells, it gets deleted.
- Select the cells you want to combine into a single cell.

- Press ALT + H to activate the Home tab on the Ribbon, and then press M > M. This merges the selected cells and aligns the text to the left of the merged cell.

To merge cells and center align the text at the same time, press C instead of M as the final key (ALT + H > M > C).

Align Left
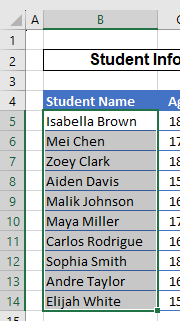
This Excel shortcut aligns text to the left in a cell.
- Select the cells you want to align to the left.
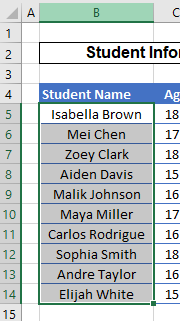
- On a PC, press ALT + H to activate the Home tab on the Ribbon. Then press, one at a time, A > L. On a Mac, use CMD + L.
Align Center
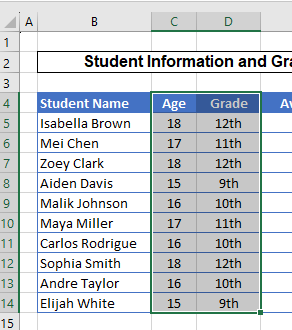
This Excel shortcut aligns text to the middle in a cell.
- Select the cells where you want the text to be centered.
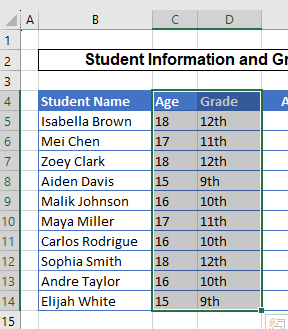
- On the PC, press ALT + H to activate the Home tab on the Ribbon and then press A > C. On a Mac, press CMD + E.
Align Right
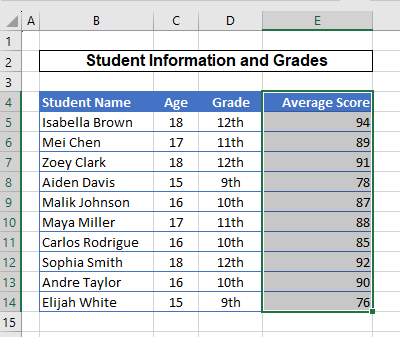
This Excel shortcut aligns text to the right in a cell.
- Select the cells where you want the text aligned to the right.
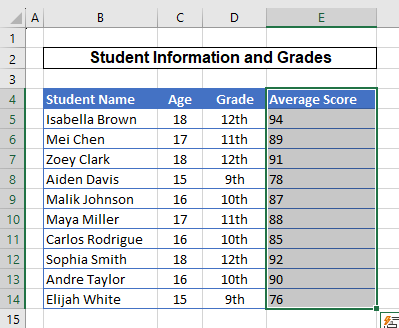
- On a PC, press ALT + H to activate the Home tab on the Ribbon. Then press, one at a time, A > R. On a Mac, press CMD + R.
Indent
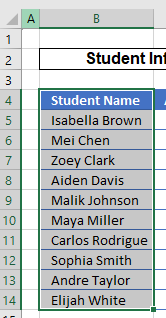
This Excel shortcut increases the text indent.
- Select the cell or cells where you want to indent.
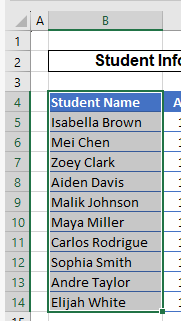
- On a PC, press ALT + H to activate the Home tab on the Ribbon. Then press, one at a time, A > 6. On a Mac, press CTRL + ALT then TAB.
Remove Indent
This Excel shortcut decreases the text indent.
- Select the cell or cells where you want to remove the indent from, shifting toward the left of the cell.

- On a PC, press ALT + H to activate the Ribbon and then press A > 5. On a Mac, press CTRL + ALT then SHIFT + TAB.

Font
Format Font
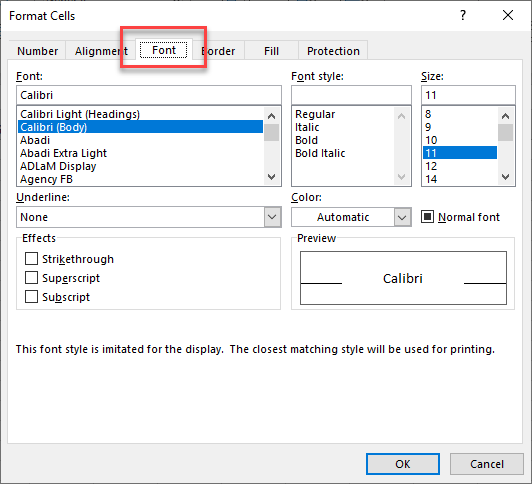
This Excel shortcut opens the Format Cells dialog box to the Font tab.
Increase Font Size
This Excel shortcut makes the font size larger.
- Select the cell or cells where you want to increase the font size.

- On a PC, press ALT + H to activate the Ribbon. Press, one at a time, F > G. On a Mac, press Command (⌘), Shift (⇧), and the right angle bracket key (>) simultaneously.

- You can also select part of the text in the cell by selecting the text in the formula bar, and then using the keyboard shortcut to increase the size of that particular part of the text.

Decrease Font Size
This Excel shortcut makes the font size smaller.
- Select the cell or cells where you want to decrease the font size.

- On a PC, press ALT + H to activate the Ribbon. Then press, one at a time, F > K. On a Mac, press CMD + SHIFT + < (left angle bracket).

- As in the case of increase font size, you can select part of the text in a cell and then use the shortcut to decrease the size of that text.
Toggle Bold Formatting
This Excel shortcut applies bold formatting (or removes bold formatting if it is already applied).
B for Bold
Select the text you want to bold and press CTRL + B (CMD + B on a Mac). Press the key combination again to remove bold formatting. You can select partial text in a cell, an entire cell, or a range of cells.

Toggle Italic Formatting
This Excel shortcut applies italic formatting (or removes italic formatting if it is already applied).
I for Italic
Select the text you want to italicize and press CTRL + I (CMD + I on a Mac). Press the key combination again to remove the italics. You can select partial text in a cell, an entire cell, or a range of cells.

Toggle Underline
This Excel shortcut applies underline formatting (or removes underline formatting if it is already applied).
U for Underline
Select the text you want to underline, and press CTRL + U (CMD + U on a Mac). Press the key combination again to remove the underline formatting. You can select partial text in a cell, an entire cell, or a range of cells.

Toggle Strikethrough
This Excel shortcut applies strikethrough formatting (or removes strikethrough formatting if it is already applied).
5 for 5trikethrough
Select the text you want to display as crossed out, and press CTRL + 5 (CMD + SHIFT + X on a Mac) on the keyboard. Press the key combination again to remove the strikethrough formatting. You can select partial text in a cell, an entire cell, or a range of cells.

Apply Superscript Formatting
This Excel shortcut applies superscript formatting.
- To apply superscript formatting to just some of the text in a cell, select the text in the formula bar.

- Press CTRL + SHIFT + F and then ALT + E to apply superscript to that portion of text in your cell.
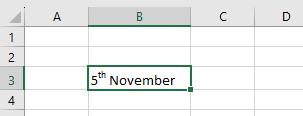
You can apply this formatting to an entire cell, a range of cells, or just some of the text contained within the cell.
Apply Subscript Formatting
This Excel shortcut applies subscript formatting.
- To apply subscript formatting to just some of the text in a cell, select the text in the formula bar.

- Then, press CTRL + SHIFT + F and then ALT + B to apply subscript to that portion of text in your cell.
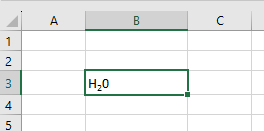
You can apply this formatting to an entire cell, a range of cells, or just some of the text contained within the cell.
Number
Apply General Format
This Excel shortcut applies the General Number Format.
- Select the cells where you want to apply the General number format. The General format uses no symbols and displays the same number of decimal places that the cell value has.
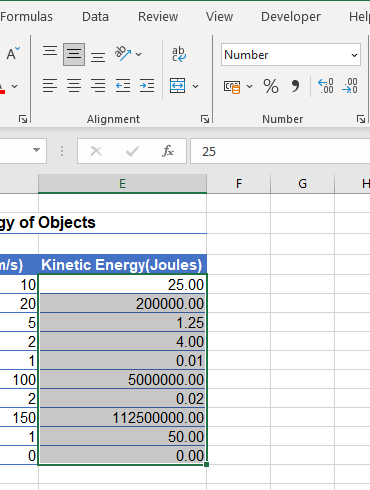
- The Mac and PC shortcuts are the same. Press CTRL + SHIFT + ~ (tilde).
Apply Number Format
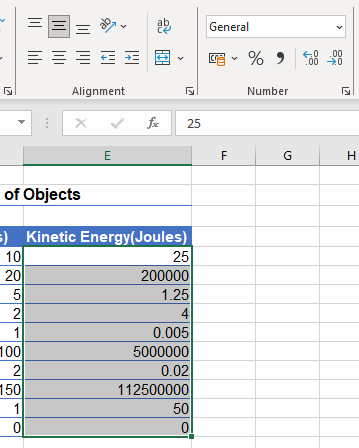
This Excel shortcut applies the “Number” Number Format. The Number format uses no symbols and displays two decimal places.
- Select the cells where you want to apply the Number format.

- The Mac and PC shortcuts are the same. Press CTRL + SHIFT + ! (exclamation point).

Apply Currency Format
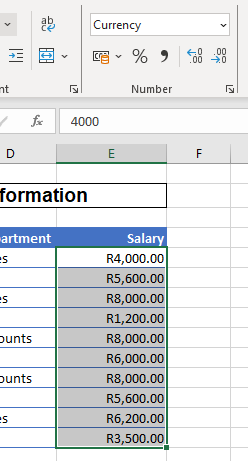
This Excel shortcut applies the Currency Number Format.
$ for Currency Format
- Select the cells where you want to apply the Currency number format. The Currency format starts with the default currency symbol from your settings and displays two decimal places at the end.
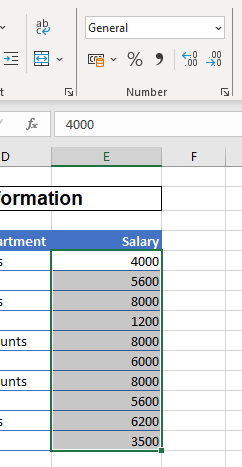
- The Mac and PC shortcuts are the same. Press CTRL + SHIFT + $ (dollar sign).
Apply Date Format
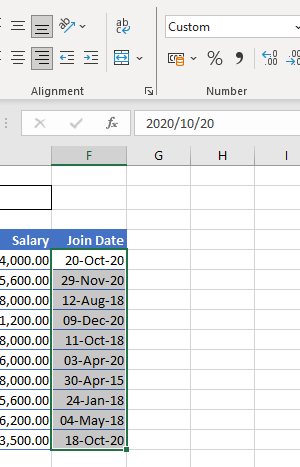
This Excel shortcut applies the Date Format.
- Select the cells where you want to apply the Date number format. The Date format uses a custom date format that displays the day, short month, and short year separated by hyphens.
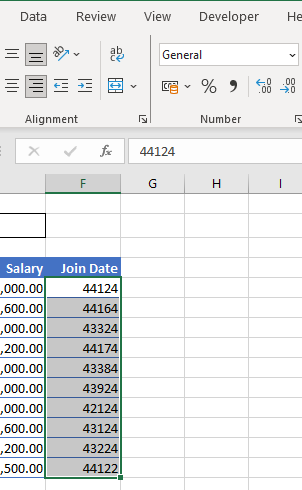
- The Mac and PC shortcuts are the same. Press CTRL + SHIFT + # (number sign / hash).
Apply Time Format
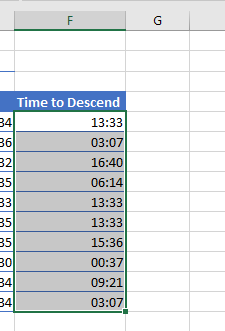
This Excel shortcut applies the Time Number Format.
- Select the cells where you want to apply the Time number format. The Time format displays hours and minutes separated by a colon.
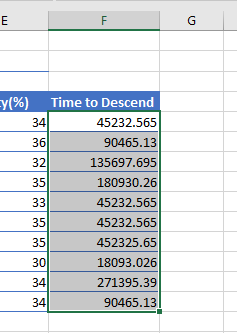
- The Mac and PC shortcuts are the same. Press CTRL + SHIFT + @ (at symbol).
Apply Percentage Format
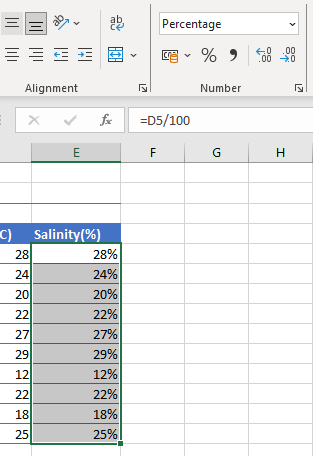
This Excel shortcut applies the Percentage Number Format.
% for Percentage
- Select the cells where you want to apply the Percentage number format. The Percentage format shows the value as a whole-number percentage (two decimal places in the cell’s value) followed by a percent sign.
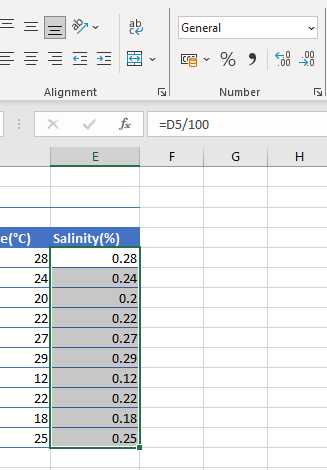
- The Mac and PC shortcuts are the same. Press CTRL + SHIFT + % (percent sign).
Apply Scientific Format
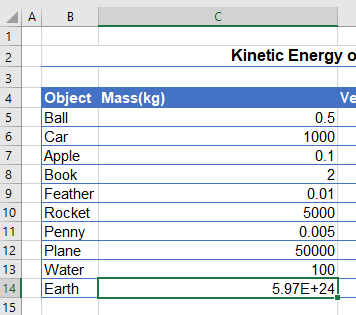
This Excel shortcut applies the Scientific Number Format.
^ is the exponent symbol, and exponents are used in scientific notation. The Scientific format applies scientific notation, which is a way of expressing numbers that are too large or too small to be written in a decimal format.
- Select the cells where you want to apply the Scientific number format to.
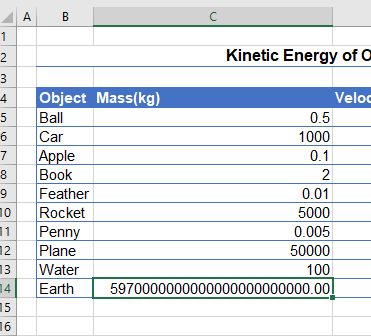
- The Mac and PC shortcuts are the same. Press CTRL + SHIFT + ^ (caret). Note that the Mac Control key and caret key, while they have a similar symbol, are not the same key.
Borders
Add or Remove Bottom Border
This Excel shortcut adds a bottom border (or removes the bottom border if it is already applied).
Select the cell or cells where you want to apply a border to the bottom of the selection, and then press ALT + H > B > B. On a Mac, press CMD + ALT + ↓ (down arrow).

Add or Remove Top Border
This Excel shortcut adds a top border (or removes the top border if it is already applied).
Select the cell or cells where you want to apply a border to the top of the selection, and then press ALT + H > B > T. On a Mac, press CMD + ALT + ↑ (up arrow).

Add or Remove Left Border
This Excel shortcut adds a left border (or removes the left border if it is already applied).
Select the cell or cells where you want to apply a border to the left of the selection, and then press ALT + H > B > L. On a Mac, press CMD + ALT + ← (left arrow).

Add or Remove Right Border
This Excel shortcut adds a right border (or removes the right border if it is already applied).
Select the cell or cells where you want to apply a border to the right of the selection, and then press ALT + H > B > R. On a Mac, press CMD + ALT + → (right arrow).

Apply Outline Border
This Excel shortcut applies outside borders.
Select the cell or cells where you want to add lines around the outside of the selection. Then press CTRL + SHIFT + & (ampersand). On a Mac, press CMD + ALT + 0 (zero).

Remove Outline Border
This Excel shortcut clears outside borders.
Select the cell or cells where you want to clear the outside borders, and then press CTRL + SHIFT + _ (underscore). On a Mac, use CMD + ALT + _.


