What & Where are Name Manager / Box in Excel & Google Sheets?
Written by
Reviewed by
This tutorial demonstrates how to create and edit range names in Excel and Google Sheets.

Range names allow you to name a cell or range with a logical name, thereby making it easier to refer to the range in formulas. For example, instead of referring to a range of cells as C5:C7, you could name the range January.
In this Article
Use the Name Box
The name box in Excel displays the range name of the current selection.
- To create a named range, highlight the cells you want to name: for example, C5:C7.
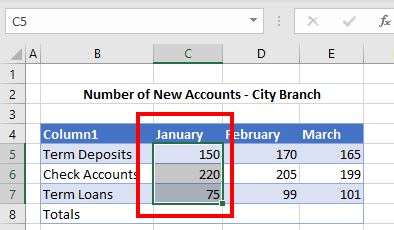
- Click inside the box in the top-left corner of the screen (it shows the current cell address: for example, C5). This is the name box.
- Type in the text for the name of that range and press ENTER.
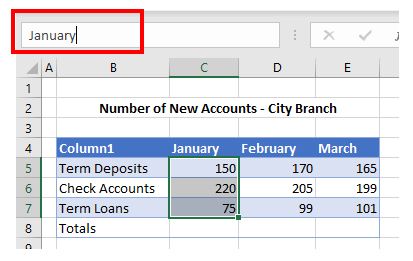
When you select the cells you have named, the range name appears in the name box.
What is Name Manager?
To view the named ranges in a worksheet, you can access Name Manager.
In the Ribbon, go to Formulas > Defined Names > Name Manager.

Tip: Use the Create from Selection command in the Defined Names group once you’re familiar with named ranges.
The name manager shows all the named ranges in the worksheet and workbook.
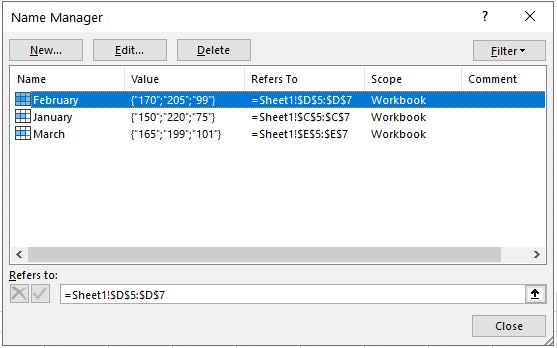
Add New Range Name From the Name Manager
- To create a range name from the name manager, click New…
- Type in the Name of the range and set the Scope. The name can be either for the individual sheet or for the entire workbook.
Note: If you choose for the name to apply in an individual sheet, you cannot use the same name on a different sheet.
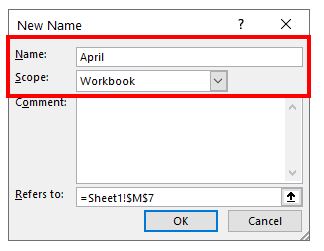
- Click the up arrow at the right of the Refers to box and highlight the cells you want to name.
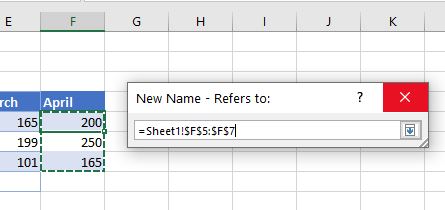
- Click the down arrow at the right side of the box to return to the Name Manager dialog box and click OK.
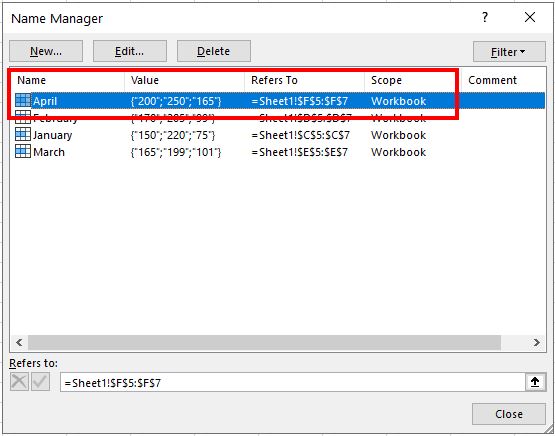
- The new name is now in the list of range names. Click Close.
- In the worksheet, highlight the cells that have just had the name assigned to them. The name assigned to the range now appears in the Name Box.
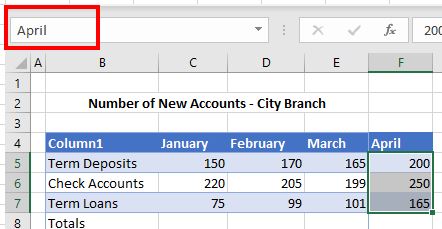
- Click the down arrow to the right of the name box to see a list of all the range names in the workbook.

Edit Range Name
To edit the range of cells in a named range, use the name manager.
- In the Ribbon, go to Formulas > Defined Names > Name Manager.
- Highlight the name to edit and click Edit…
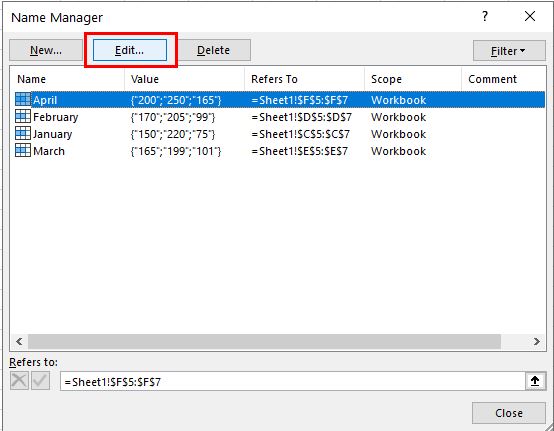
- To change the range of cells that the name refers to, click the up arrow to the right of the Refers to box and select the new range.
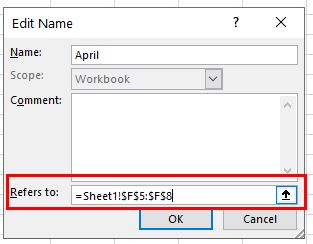
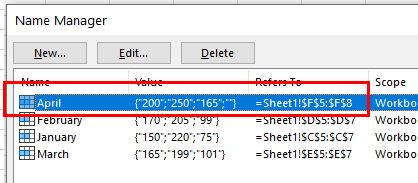
- Click OK to return to the Name Manager dialog box. The new range assigned to the range name (e.g., F5:F8 instead of F5:F7) is shown under Refers To.
Delete Range Name
To delete a named range, use the name manager.
- In the Ribbon, go to Formulas > Defined Names > Name Manager.
- Choose the Name to delete, and then click the Delete button.
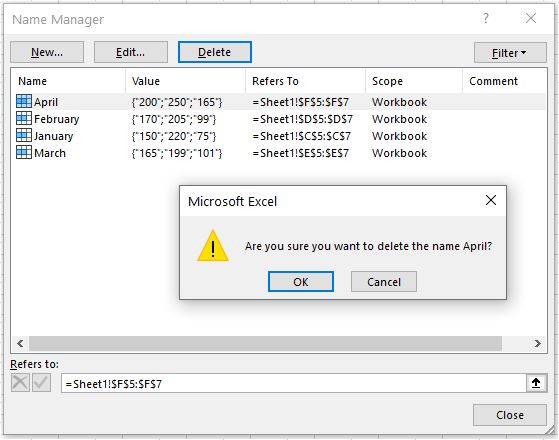
- Click OK to delete the range name, and then click Close.
Manage Named Ranges in Google Sheets
Create Named Range in Google Sheets
You can create a range name in Google Sheets using the name box, just as you do in Excel.
Highlight the cells to name, type a name in the name box, and then press ENTER to create the range name.
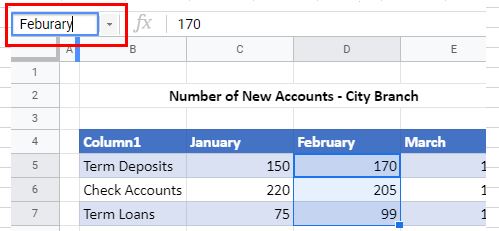
To view all the range names in the Google sheet, click the down arrow to the right of the name box.
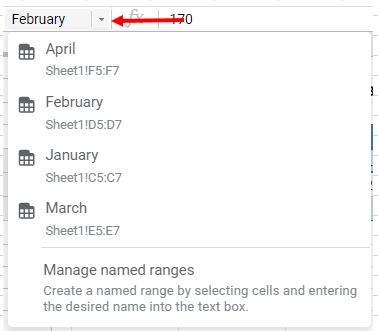
To view the Google Sheets equivalent of Excel’s Name Manager, click Manage named ranges.
Or in the Menu, go to Data > Named Ranges.
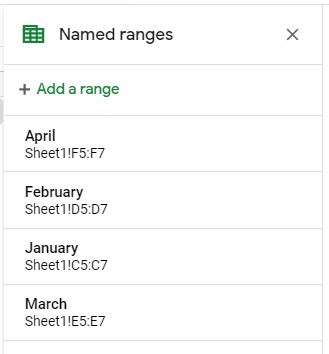
This displays a list of all named ranges in the sheet.
Edit Named Range in Google Sheets
- In the Menu, go to Data > Named Ranges.
- To edit a named range, click on the range name and click the Edit button.

- Click the data range box.
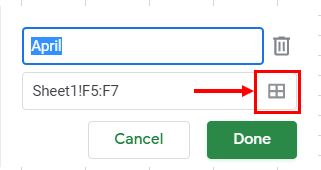
- Change the range of cells for the range name by selecting the cells in the spreadsheet, and then click OK.
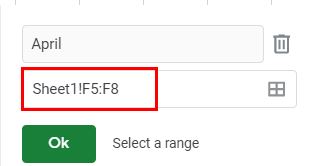
- Click Done to update the named range.
Delete Named Range in Google Sheets
- In the Menu, go to Data > Named Ranges.
- Click on the range name and click the Edit button.

- Click the Delete button.
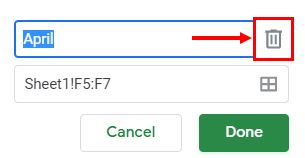
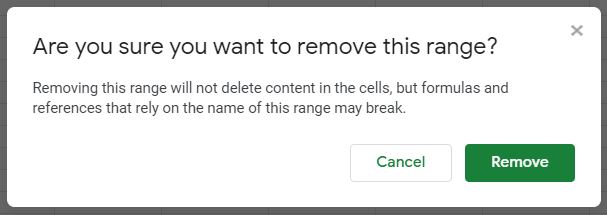
- Click Remove to remove the range name.
