How to Turn On or Change AutoCorrect in Excel
Written by
Reviewed by
This tutorial demonstrates how to turn on AutoCorrect and change AutoCorrect settings in Excel.
Turn On AutoCorrect
AutoCorrect is a feature in Excel that corrects correct typos, incorrect capitalization, accidental use of CAPS LOCK, and misspelled words. It can also insert symbols and other pieces of text automatically.
By default, the AutoCorrect feature is enabled in Excel, but it can be turned off. In that case, follow these steps to turn it back on:
- In the Ribbon, go to File > Options.

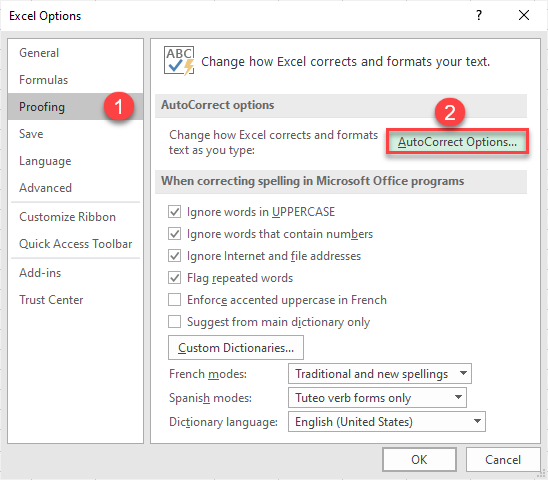
- This opens the Excel Options window. Go to the Proofing tab. Under AutoCorrect options, click AutoCorrect Options…
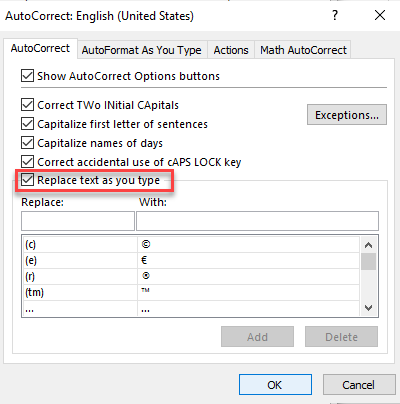
- In the AutoCorrect window, check the box for Replace text as you type and click OK.

Now, if you type in something AutoCorrect determines is a likely error, the text is automatically changed for you.
New AutoCorrect Entry
The AutoCorrect feature uses a list of typical misspellings and symbols; you can add, change, or delete the words or symbols on the list.
- In the Ribbon, go to File > Options.
- In the Excel Options window, click Proofing, and in the AutoCorrect options section, click AutoCorrect Options…

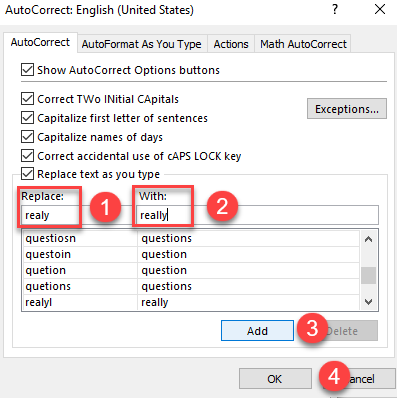
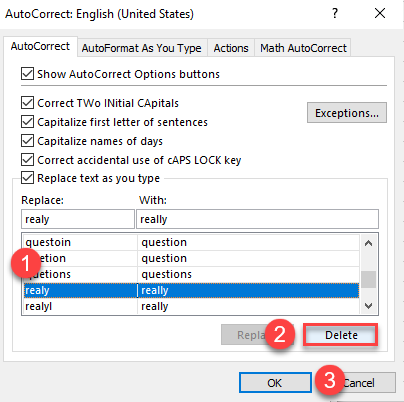
- This opens the AutoCorrect dialog box. To add a new word to the list, type in a word or phrase you often misspell (e.g., realy) under Replace and the correct spelling of the word (really) under With. Click Add, then OK.
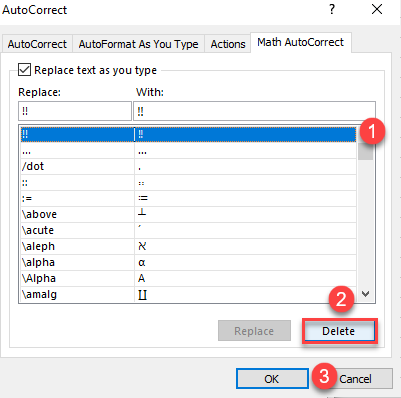
Tip: To delete an entry, select it from the list, and then click Delete. Click OK to apply the change.
AutoCorrect Exceptions
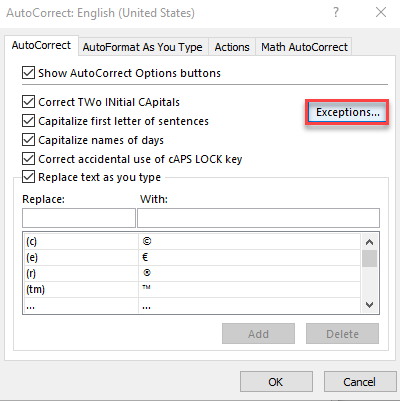
There is also an Exceptions list that tells spellchecker not to automatically replace items it thinks are misspelled. To access the list, in the AutoCorrect window click Exceptions…
You can also change this list by adding, deleting, or changing the entries. The process is the same as for the AutoCorrect list.
Edit Math AutoCorrect
Excel has a long list of shortcuts you can use for inserting math-specific characters. To change that list, follow these steps:
- In the Ribbon, go to Insert > Symbol.

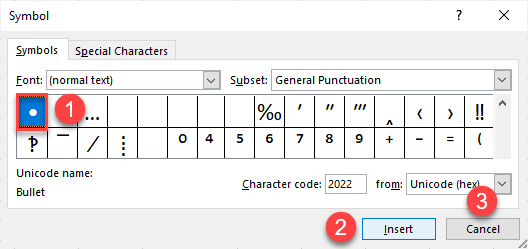
- From the Symbol dialog box, choose the symbol you need (here, a standard Bullet from the General Punctuation Subset). Click Insert, then Cancel. This adds the symbol to the cell and returns to Excel.
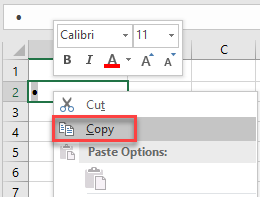
- After that, select the symbol, right-click it and choose Copy (or use the CTRL + C shortcut).
Note: Instead of copy-pasting this particular symbol, you can type ALT + 7 (in the numeric keypad) directly into the With field.
- Go to File > Options > Proofing > AutoCorrect Options…
- Go to the Math AutoCorrect tab. Type the AutoCorrect shortcut you want to use under Replace. Paste (CTRL + V) the symbol under With. Click Add, then click OK to apply and close the window.
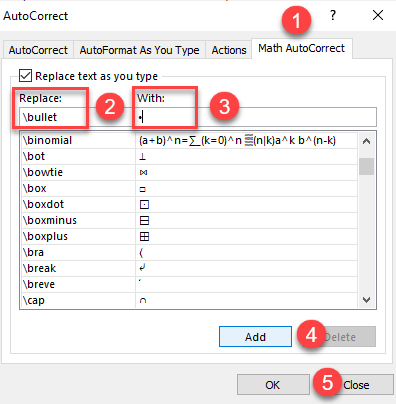
Now, if you type \bullet in Excel, AutoCorrect changes it to •.
Tip: To delete an item from the list, select that item, and then click Delete. Click OK to apply the change.
