How to Swap / Move Columns in Excel & Google Sheets
Written by
Reviewed by
This tutorial demonstrates how to swap columns in Excel and Google Sheets.
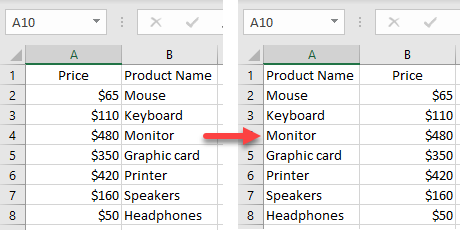
Drag Columns
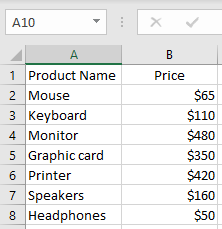
The first option for swapping two columns is to drag one column after another. Say you have the following dataset and want to swap the columns Price and Product Name.
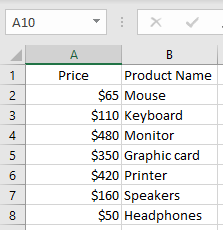
- Select the first column (A) and position the cursor to the right border of the column until it turns into the four-sided arrow.
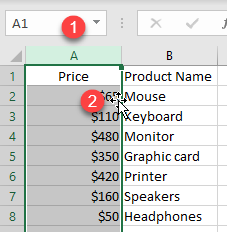
- Hold down the SHIFT key on the keyboard and drag and drop the first column to the desired position (after the second column).
You can see the green line between columns indicating where the selected column will be moved.
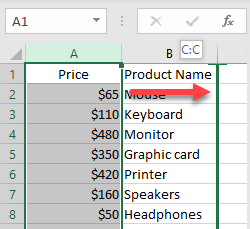
As a result, columns are now swapped.
Note: Similarly, you can swap multiple columns. Just select as many columns as you need.
Cut and Paste Columns
Another option for swapping columns is to cut and paste a column.
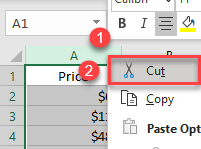
- Right-click the heading of a column you want to move (A), and choose Cut (or use the keyboard shortcut CTRL + X).
- Right-click the column heading before which you want to paste the cut column (C), and choose Insert Cut Cells.
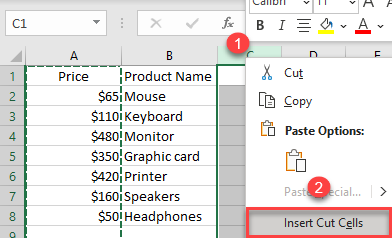
The result is the same: The columns Price and Product Name are swapped.

Move Columns in Google Sheets
Drag to Swap Columns
The easiest way to swap columns in Google Sheets is by dragging a column.
- Select the column to move (A) and drag the column heading (the cursor changes to a hand).
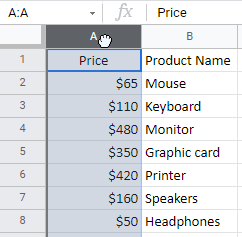
- Move the column after the second column (B) and drop. As you move, the vertical line indicates where will the column be placed when you drop the cursor.
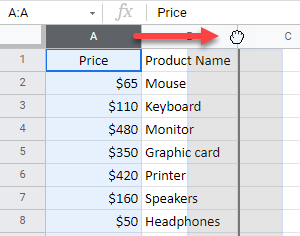
This moves Column A after Column B.
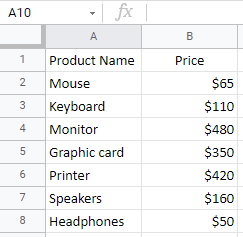
Move Option in Menu
Unlike Excel, Google Sheets has the option in the menu to move rows or columns. Select the column to move (A), and in the menu, go to Edit > Move > Column right.
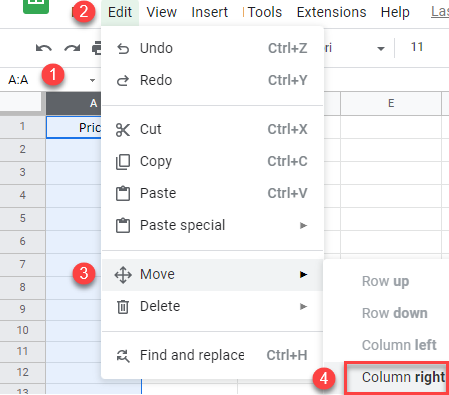
Again, the columns are swapped.
Note: There is also the option to cut and paste a column, but this is the slowest method, as you must delete the empty column after pasting.

