How to Send Mass Email From List in Excel & Google Sheets
Written by
Reviewed by
This tutorial demonstrates how to send a mass email from a list in Excel and Google Sheets.

Collaborating between Excel and Word allows you to send bulk emails from a list in Excel automatically by using the Word mailing feature.
Create Mailing List
- Set up mailing fields in Excel by creating a list of names, email addresses, and customized body messages in Excel.
- The top row in the worksheet must contain the field names for the mailing list.

- Format any values as text fields so they can merge correctly in Word.
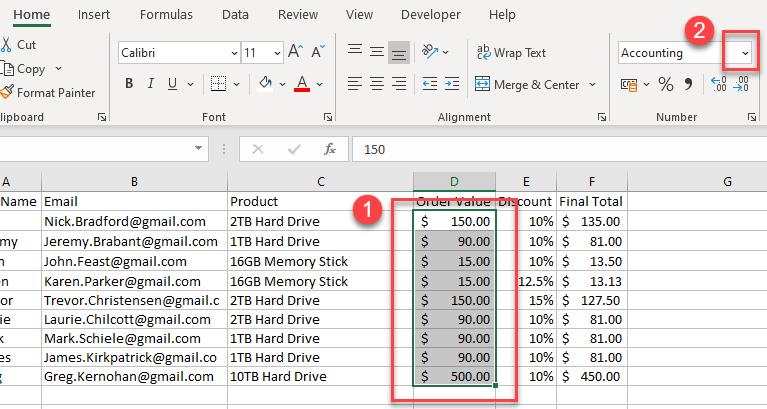
The example above, has an order value, a percentage discount, and a final total. All fields need to be formatted as text and not as a number if you want them to appear correctly in the mail merge document.
Select the numbers that need to be formatted. Then in the Ribbon, go to Home > Number and click the arrow to the right of the number format drop-down list.
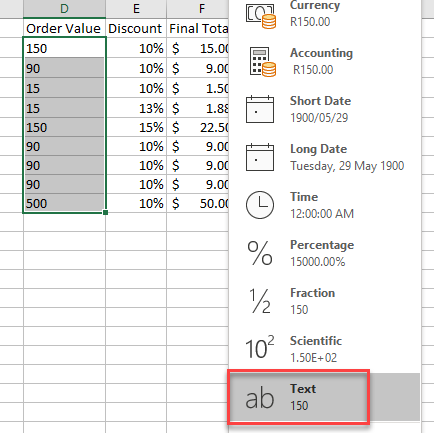
- Select Text from the drop-down list to format the numbers for text.
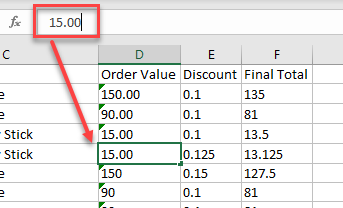
If you want the decimal point to show in the mail merge, physically type them into each cell (or use a formula to insert decimals as text). The green triangles in these images are due to values being stored as text, but that’s intentional here. Ignore the warning messages or remove them globally.
If you want percentages to show up properly, make sure to type in the actual percentage value (i.e., 10 instead of 0.1).
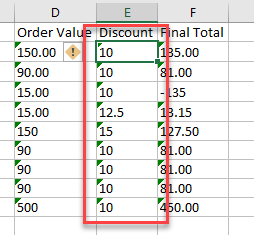
- Once you have filled in the list and formatted the data correctly, save and close the file.
Mail Merge in Word
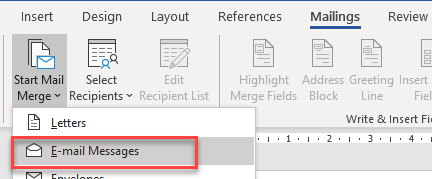
- In a blank Word document, click in the Ribbon and go to Mailings > Start Mail Merge > E-mail Messages…
- Start typing the email, and then in the Ribbon, go to Mailings > Write & Insert Field > Insert Merge Field. Select the appropriate field from the list.
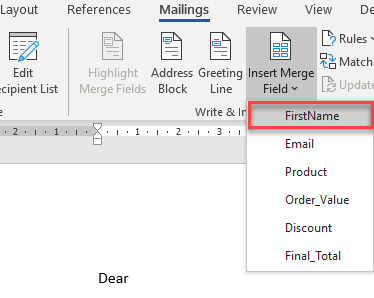
- Continue to create the email, inserting the fields where required.

If you want $ or % signs to show up in the mail merge, make sure to put them before or after applicable fields.

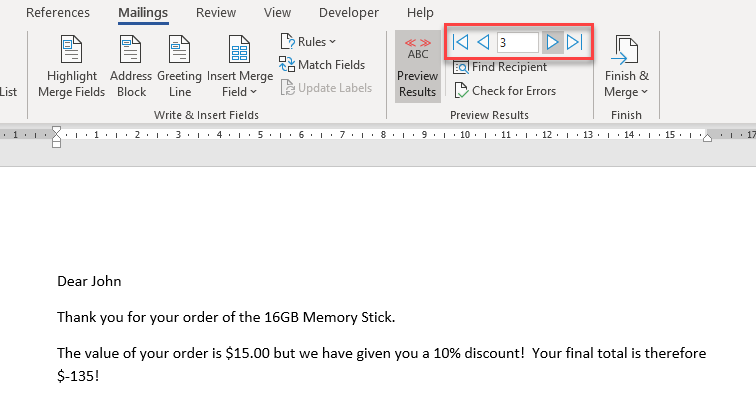
- To see a preview of your email, in the Ribbon, go to Mailings > Preview Results > Preview Results.
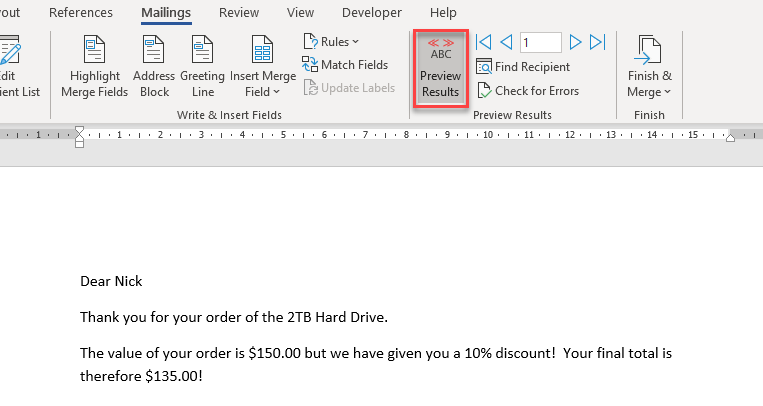
- To view another record, or scroll through all the records, you can click on the relevant navigation button in the Preview Results group.
Send Emails
To create the emails, in the Ribbon, go to Mailings > Finish > Finish & Merge > Send Email Messages…

Send Mass Email in Google Sheets
With default settings, Google Sheets doesn’t work directly with mail merge in Word, but you can still send mass emails in a similar way.
- First install an add-on. Open a Google sheet. In the Menu, select Extensions > Add-ons > Get add-ons.

- This opens the Google Workspace Marketplace.
Type “Mail Merge” into the search box, and then press ENTER on the keyboard.
Scroll down until you find Mail Merge for Gmail (Gmail Merge). Click on that add-on.
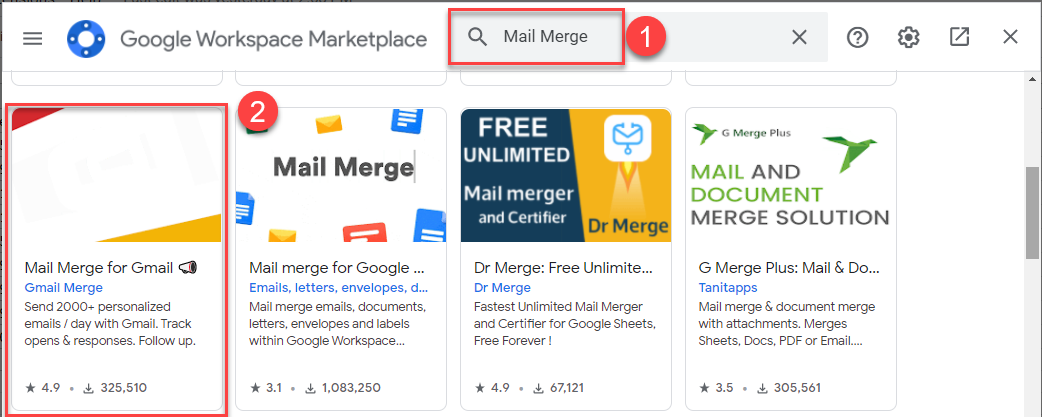
There are many mail merge add-ons available; this tutorial concentrates on the one selected here.
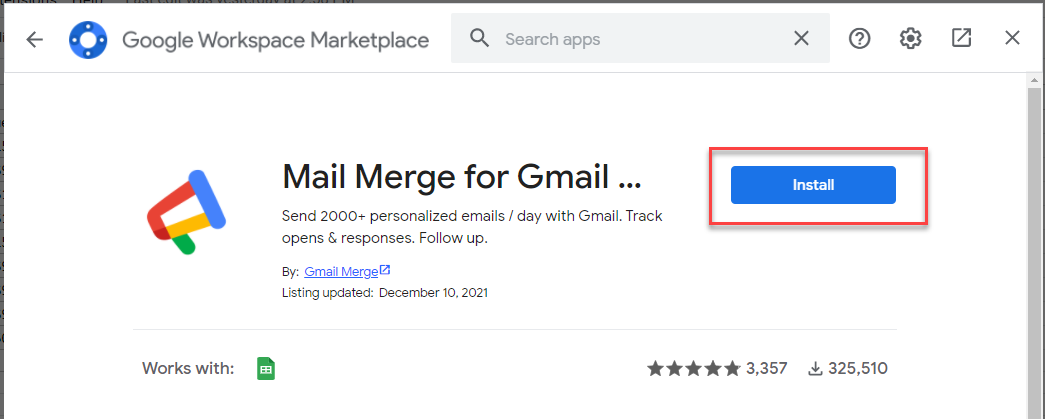
- Click Install to install the add-on.
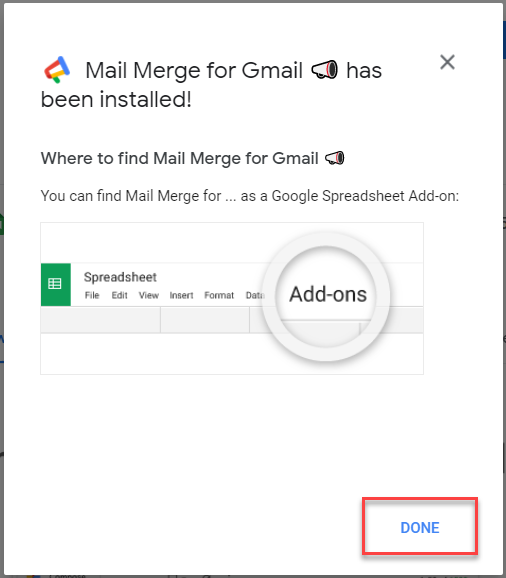
- Then, log into your Google account and give permission for the add-on to access your Gmail. Once you have done this, the add-on is installed. Click DONE.
- Create or open the list that contains the data you wish to email in your spreadsheet.

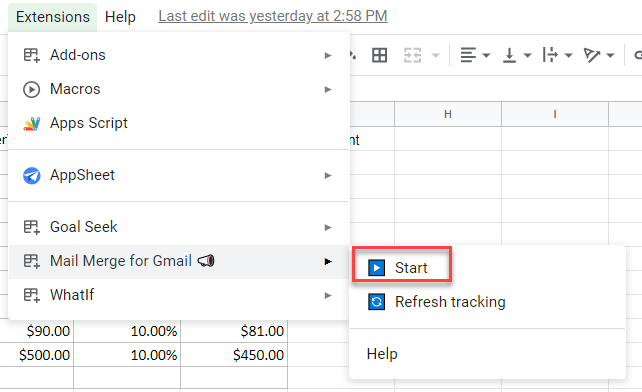
- In the Menu, select Extensions > Mail Merge for Gmail > Start.
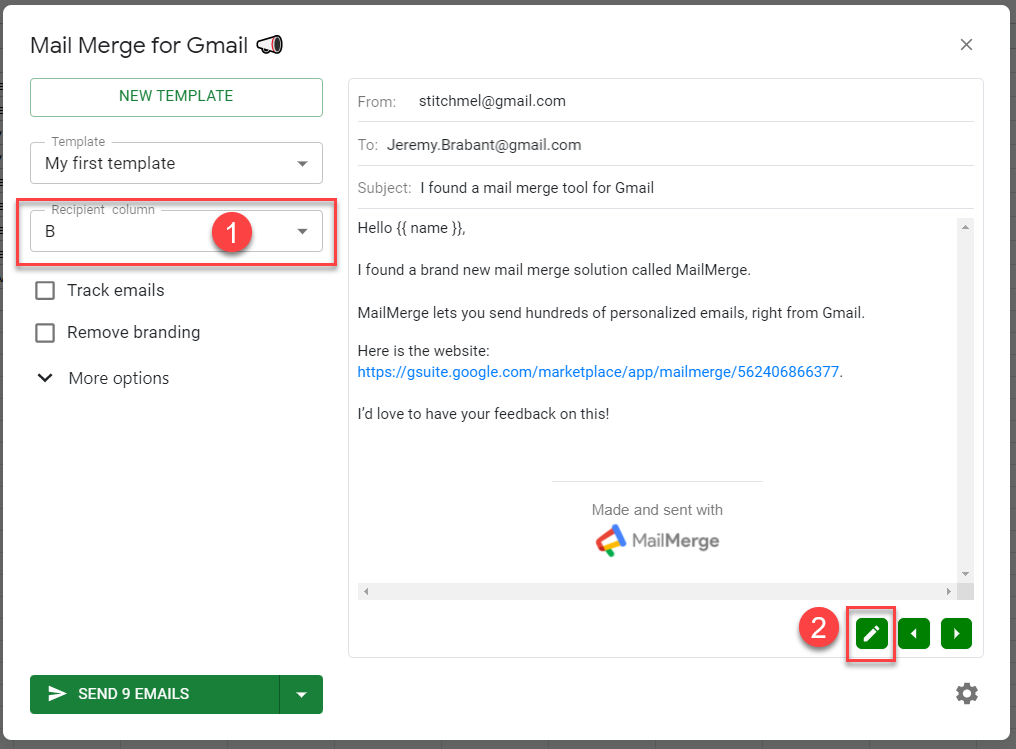
- A standard Gmail template shows up with the first name shown as the recipient.
Note that (1) the column with your recipients’ email addresses is automatically selected, but you may need to change that. Click (2) the pencil icon to edit the template.
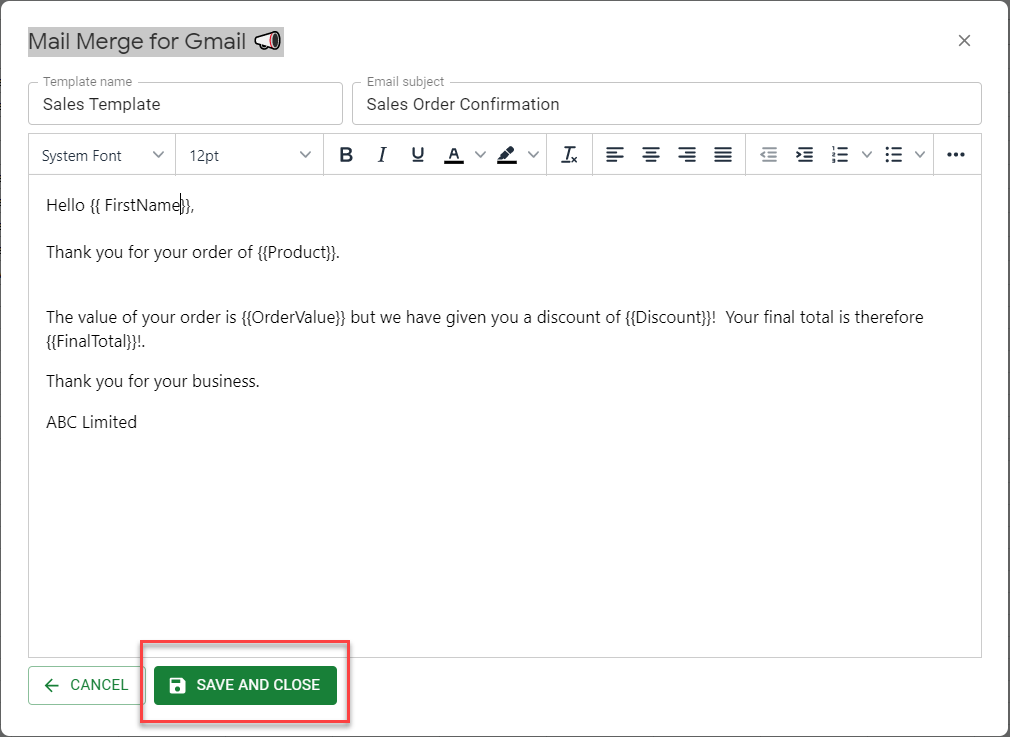
- Adjust the template as necessary. You can amend the template name and the email subject. When you add in fields from your spreadsheet, the fields need to be place in double curly brackets ({{field}}) as shown below. You can also adjust the format of the text using the format Toolbar provided (font color and size, bold, italic, underline, alignment, etc.).
- Click SAVE AND CLOSE to save the template.
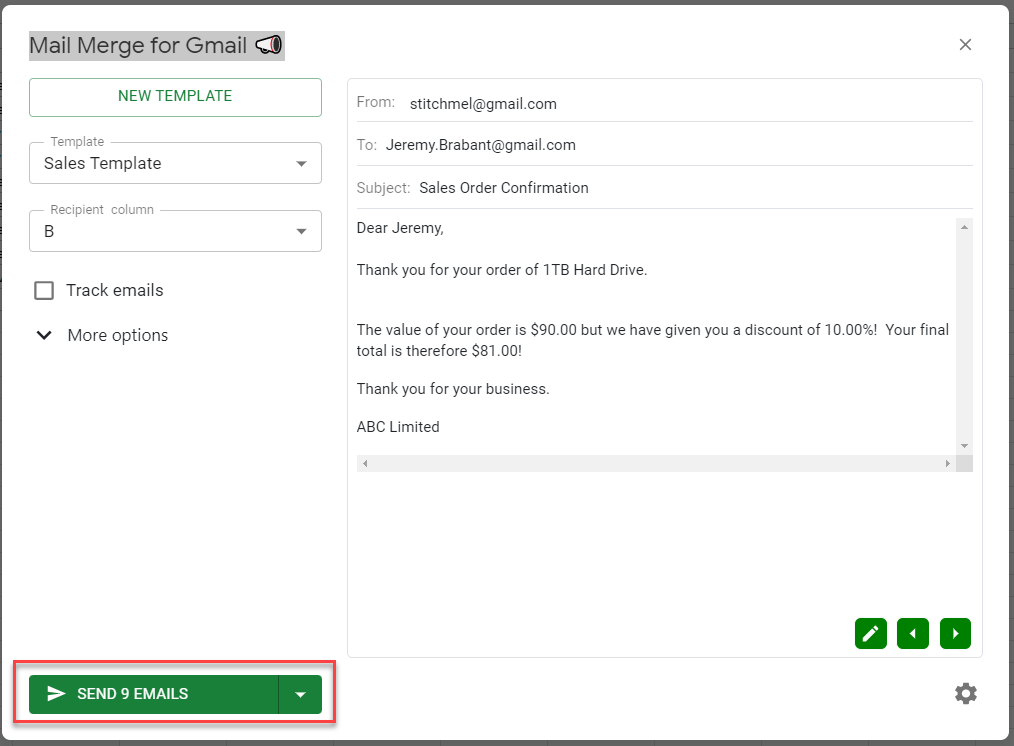
- Click the SEND EMAILS button. The number shown in the bottom-left corner (here, 9) depends on the number of rows in your list.
- A message shows up indicating that the emails are being sent, and another will appear once the emails have been successfully sent. Click CLOSE to dismiss the message.
