How to Password Protect / Encrypt a File in Excel
Written by
Reviewed by
Last updated on September 12, 2023
This tutorial demonstrates how to password protect a file in Excel.

Encrypt a File
Add Password in Info Settings
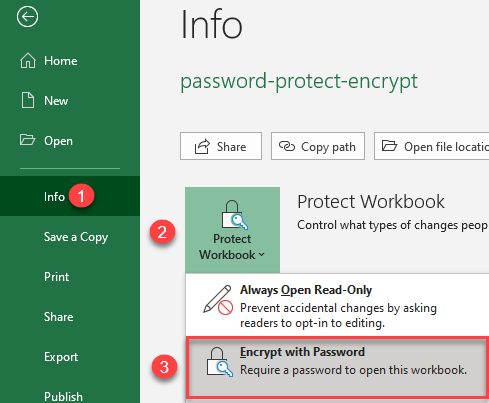
There are several ways to protect an Excel file with a password. Here are the steps for encrypting a file through Info settings:
- In the Ribbon, go to File > Info. Click Protect Workbook and choose Encrypt with Password.
- In the pop-up window, type in a password and click OK.
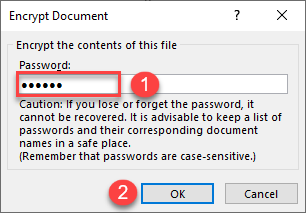
- Reenter the password.
As a result, the workbook is protected with a password, and if you go back to the Ribbon, File > Info, you get the message that a password is required to open this workbook.

Password Protect From the Review Tab
Another way to encrypt a file with a password is to go through the Ribbon.
- Go to Review > Protect Workbook.

- In the pop-up window, type in a password, and click OK.
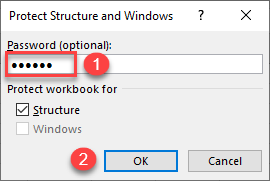
- Reenter the password.
Now the file is locked with a password, and if you go back to the Review tab, the Protect Workbook icon is grayed.

Password Protect at Save
You can also protect an Excel file while saving it.
- In the Ribbon, go to File > Save As.

- In the save window, click More options…
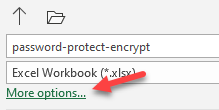
- In the bottom-right of the Browse window, click Tools and choose General Options…

- In the General Options pop-up, type in a password to open and modify. Then click OK.
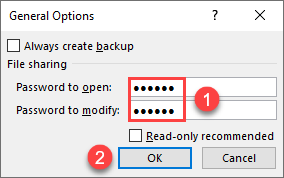
- Type in the password once more to confirm.
The file is now locked with a password.
Tip: You have options for the type of protection on a workbook. See how to mark a workbook as final or lock specific cells. On the other hand, change a read-only file or unprotect a workbook.

