Outline Cells (Apply All Borders) in Excel & Google Sheets
Written by
Reviewed by
This tutorial demonstrates how to outline cells by applying all borders in Excel.
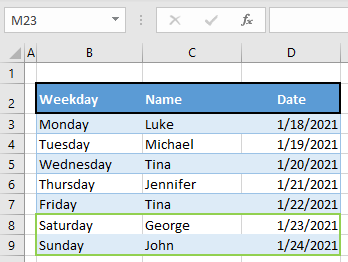
There are plenty of options for formatting with borders in Excel. Let’s see how to apply and remove all borders to a cell or range of cells and look at advanced options such as border type, thickness, and color.
In this Article
Tip: If you’re looking for Excel’s Outline feature for grouping rows, see Create Auto Outline to Group Rows and Columns, How to Create an Outline, or How to Group Cells.
Apply All Borders
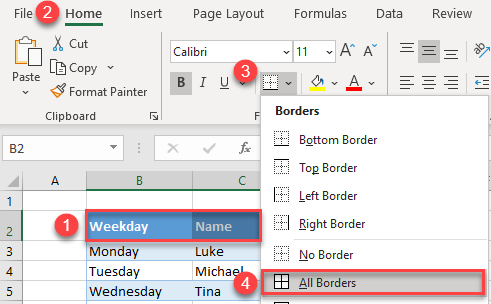
For this example, apply all borders to a range of cells. Outline the table heading cells (B2:D2).
- First, select the range.
- Then in the Ribbon, go to the Home tab.
- Click the arrow beside the border icon in the Font part.
- In the menu, click All Borders.
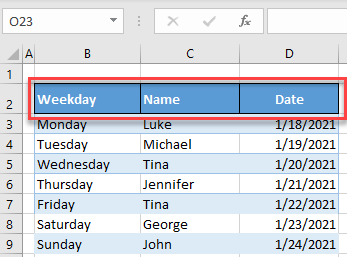
As a result, there are borders around cells B2:D2, outlining table headings.
Thick Outside Borders
Another option is setting thick outside borders. This option creates a thick outline around the selected range of cells. We’ll use the same example but now set thick outside borders for the headings (B2:D2).
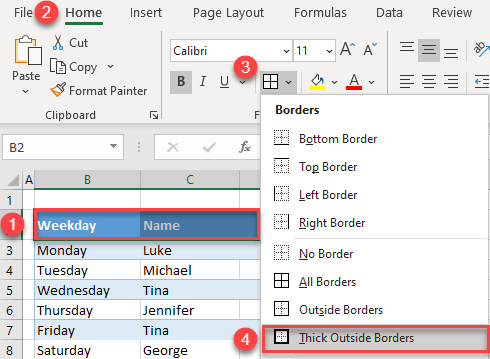
- First, select the range.
- Then, in the Ribbon, go to the Home tab.
- Click the arrow beside the border icon in the Font group.
- In the menu, click Thick Outside Borders.
As a result, cells B2:D2 have now have thick outside borders.
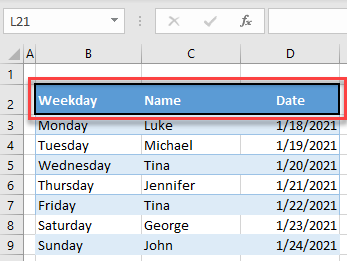
Not only are these borders more noticeable than in the first example, where all borders were applied, but they also outline the table headings rather than each individual cell.
Set Borders Using Format Cells
An alternative option for setting borders is using the Format Cells menu in the Font tab.
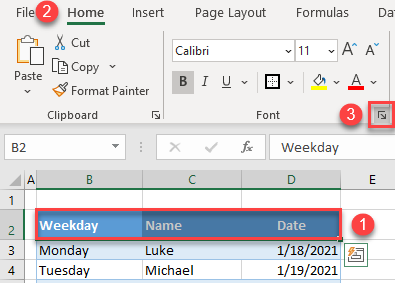
- First, select the range (B2:D2). Then, in the Ribbon, go to the Home tab and click Font Settings (the arrow in the bottom right corner of the Font tab).
- Now in the Format Cells dialog box, go to the Border tab, and under Presets, click Outline.
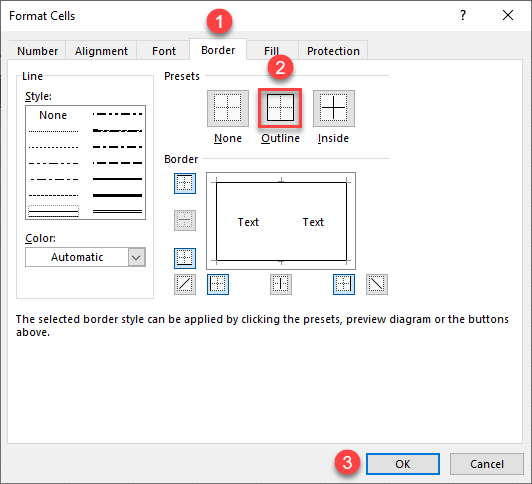
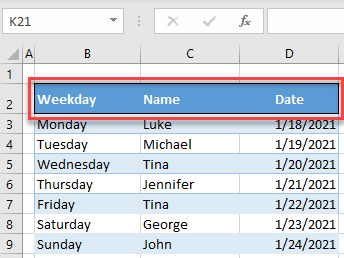
As you can see in the preview all four borders are set, outlining the selected range (B2:D2).
Remove Cell Borders
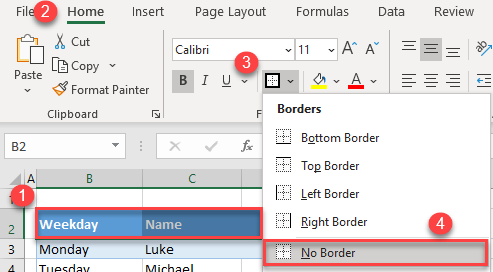
- To remove borders from a cell or a range of cells, first select the range where you want the borders removed (B2:D2).
- Then go to the Home tab.
- Click the arrow beside the border icon in the Font group.
- In the menu, click No Border.
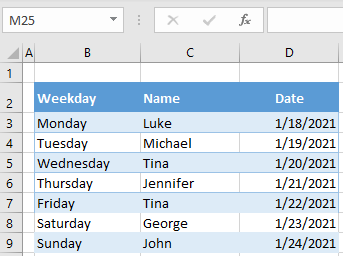
As a result, all borders are removed from the selected range.
Change Border Color
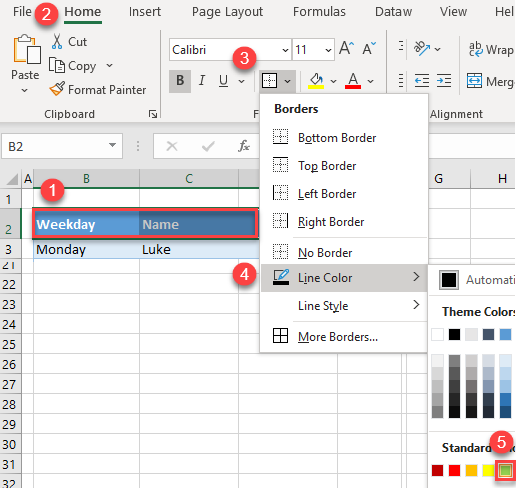
If you want to change the border color, do it before outlining the range.
- First, select the range where you want the borders applied (B2:D2). Then go to the Home tab and click the arrow beside the border icon in the Font group. In the menu, go to Line color and pick a color (here, light green).
- Now, the color is set for every border applied after this change. Apply the thick outside border in green.
First, select the range (B2:D2). Then, in the Ribbon, go to the Home tab and click the arrow beside the border icon in the Font group. In the menu, click Thick Outside Borders.

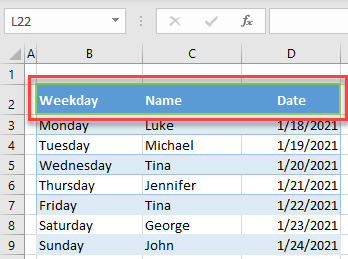
The result is a thick green outside border for the headings (B2:D2), as you can see in the picture below.
Apply All Borders in Google Sheets
Using the same example, we’ll explain how to apply all borders to cells in Google Sheets.
- First, select the range (B2:D2).
- Choose the Borders icon in the Toolbar.
- Now choose from offered options and click All Borders.
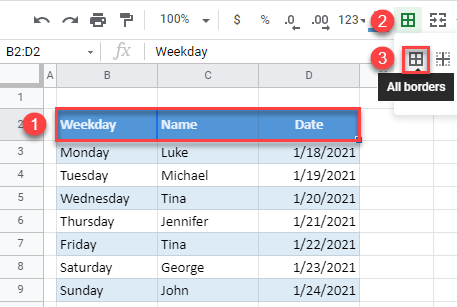
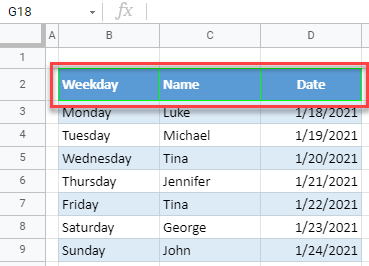
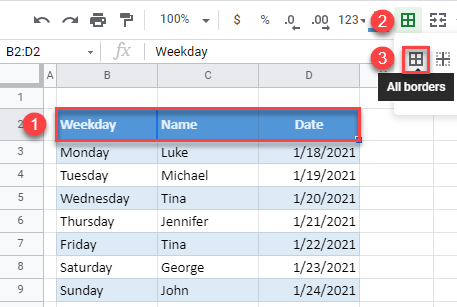
As a result, the table heading (cells B2:D2) has all borders applied.
Border Style in Google Sheets
To change the border color in Google Sheets, first change border settings.
- Click the Borders icon in the Toolbar, and then go to Border color and choose a color (e.g., green).
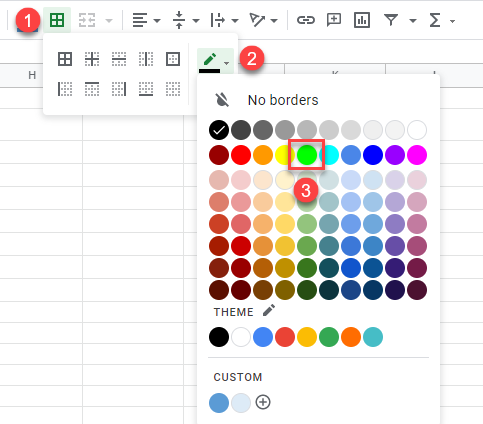
- In the same way, you can also change the border style. First, click the Borders icon in the Toolbar, then go to Border style, and choose a style (here, the third option: the thickest line style).
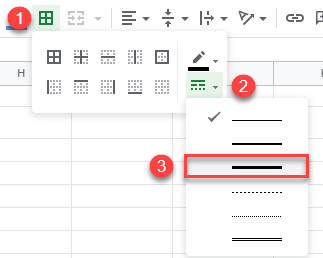
- If you set all borders again, you get thick, green borders around (and between) cells B2:D2.
