How to Lock Formatting in Excel
Written by
Reviewed by
This tutorial demonstrates how to lock formatting in Excel.

Lock a Range of Cells For Formatting
In Excel, you can lock either the entire worksheet or a range of cells for formatting, while editing is still allowed. Say you have the list of names shown below in Column B.
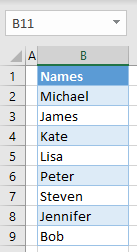
Now you want to lock only cells with values (B2:B9) for formatting. However, the user should still be able to edit or delete any cell.
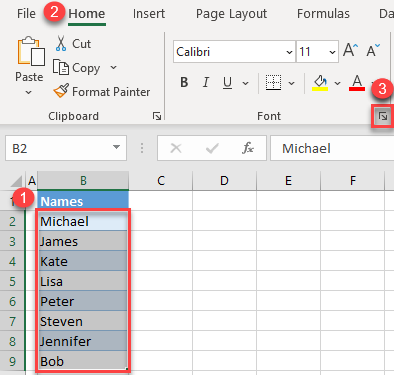
- Select the range of cells to lock for formatting (B2:B9) and in the Ribbon, go to Home > Font Settings in the bottom-right corner of the Font group (or use the keyboard shortcut CTRL + 1).
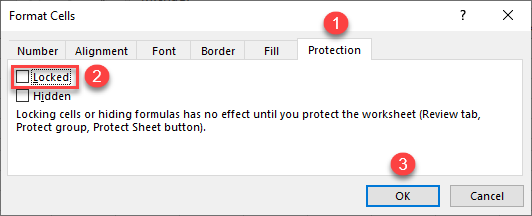
- In the Format Cells window, go to the Protection tab, uncheck Locked, and click OK.
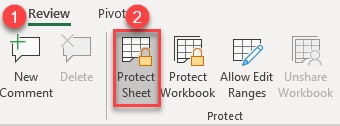
- In the Ribbon, go to Review > Protect Sheet.
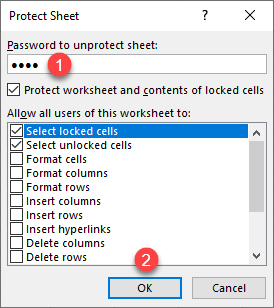
- In the Protect Sheet window, enter a password (not mandatory), and click OK.
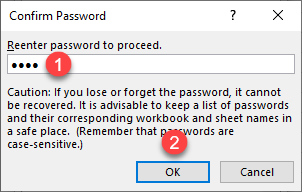
- In the pop-up window, re-enter a password to confirm, and click OK.
As a result, cells B2:B9 are now locked for formatting. If you select any cell in this range and go to the Home tab, you can see that all formatting options are grayed out, meaning you can’t use them.

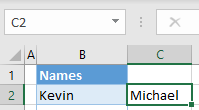
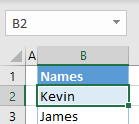
On the other hand, if you try to change the content of a cell, it is possible. As you can see in the picture below, the value of cell B2 is changed from Michael to Kevin.
Also see how to unlock the sheet and protected cells.
Lock the Entire Sheet For Formatting
Similar to locking certain cells, you can also lock the entire sheet for formatting in Excel.
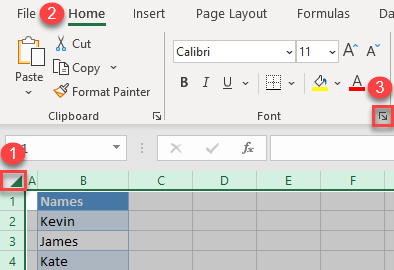
- Select the entire sheet by clicking on the arrow in the upper-left corner (or use the keyboard shortcut CTRL + A) and in the Ribbon, go to Home > Font Settings in the bottom-right corner of the Font group (or use the keyboard shortcut CTRL + 1).
- In the Format Cells window, go to the Protection tab, uncheck Locked, and click OK.

- In the Ribbon, go to Review > Protect Sheet.

- In the Protect Sheet window, enter a password (not mandatory), and click OK.

- In the pop-up window, re-enter a password to confirm, and click OK.

As a result, all cells in the sheet are now locked for formatting. If you select any cell in the sheet and go to the Home tab, you can see that all formatting options are grayed out, meaning you can’t use them.

Again, if you try to edit the content of a cell, it is possible. You successfully entered Michael in cell C2.
