How to Insert a Digital Signature & Sign a Document in Excel
Written by
Reviewed by
Last updated on September 14, 2022
This tutorial demonstrates how to insert a digital signature and sign a document in Excel.
Insert a Digital Signature
A digital signature, or digital ID, is an encrypted stamp of authentication that confirms that a document and its contents come from the signer. To insert one, follow these steps:
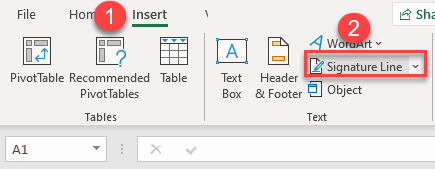
- First, in the Ribbon, go to Insert tab > Signature Line (from the Text group).
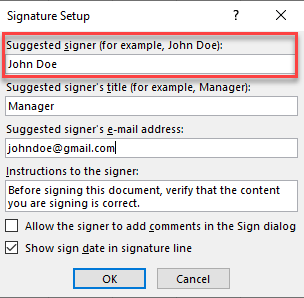
- The Signature Setup window appears. In the Suggested signer box, put the name to be signed. You can also add the signer’s title and/or email address. If you are not the signer, you can put instructions to the signer which appears in the Sign window as a reminder for signers before they sign the document.
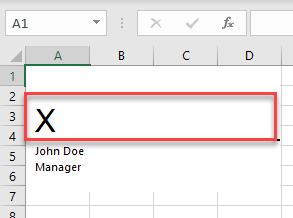
- After you click OK, the signature line appears.

Sign a Document
- To sign the signature line, first be sure that the data is ready and there are no outstanding changes from either side. After you are sure the data on the spreadsheet is ready, double-click the signature line.
- After double-clicking on it, the window below appears, asking you to save the workbook in a format that supports digital signatures; to procced, click Yes.

- Now, you’re in the Sign window. To insert the signature, type the name right next to the X or insert a picture to use as a signature. Then click Sign.
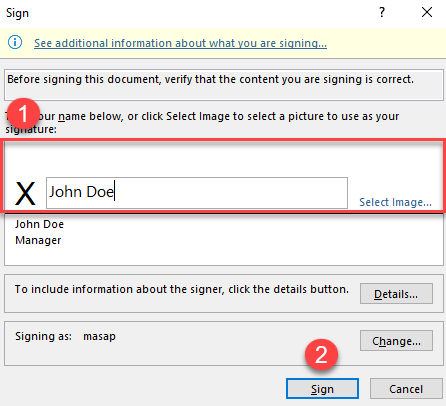
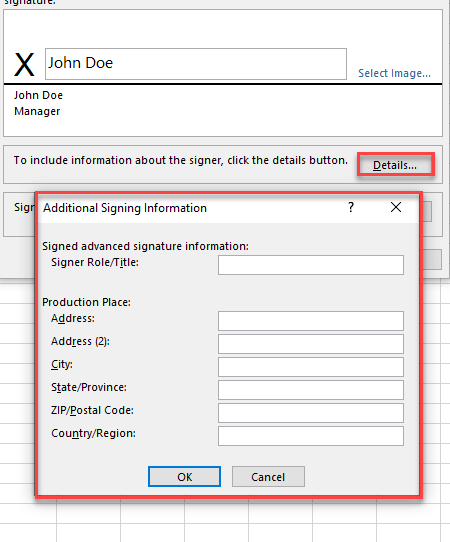
Before clicking Sign, you could also click on the Details button, which opens the Additional Signing Information window. Here, you can add additional information about the signer.
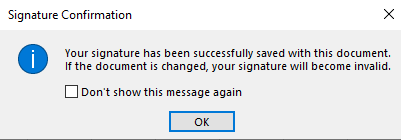
- After clicking on the Sign button, the Signature Confirmation window appears to inform you that you signed the document. Now, if you make any changes to the file, the signature becomes invalid.
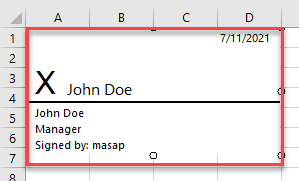
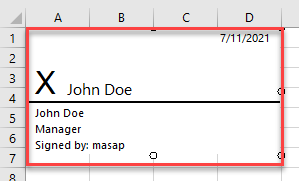
As a result, the signed signature line appears.
Unfortunately, you can’t insert a digital signature in Google Sheets.

