How to Indent (or Increase Indent) in Excel & Google Sheets
Written by
Reviewed by
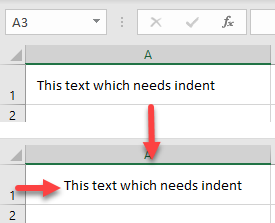
This tutorial demonstrates how to increase and decrease indentation in Excel and Google Sheets.
Excel Add or Remove Indent Shortcuts
Indent
This Excel shortcut indents the selected text.
PC Shortcut:Alt>H>6
Mac Shortcut:⌃+⌥>tab
Remove Indent
This Excel shortcut removes indents the selected text.
PC Shortcut:Alt>H>5
Mac Shortcut:⌃+⌥>⇧>tab
In this Article
Indent Cells
Using Excel’s alignment options, you can adjust the text indent in the cell. You can move the text from the cell border to the left or the right. For example, you can move the text in cell A1 a bit from the left border.
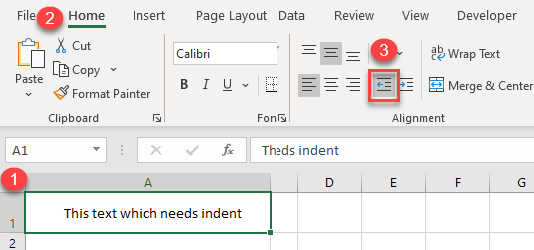
- Select a text cell (A1).
- In the Ribbon, go to the Home tab.
- In the Alignment group, choose Increase Indent.
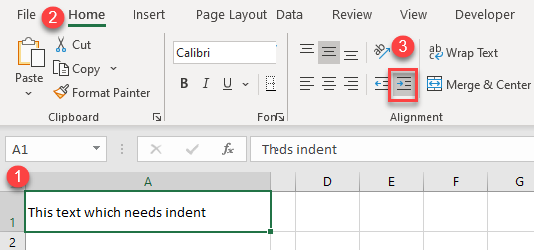
As a result, the text in cell A1 is moved a bit from the left border.
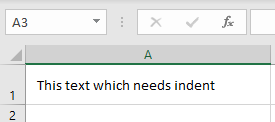
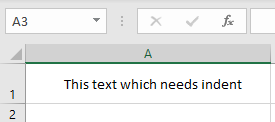
If you want to increase indent, click the Indent Increase icon several times. If you click three more times, for example, the text is moved farther from the left border, as shown below.
Decrease Indent
- To decrease indent and move text back to the left border, select the cell again.
- In the Ribbon, go to the Home tab.
- Click Decrease Indent. If you increased the indent several times, you’d have to decrease it several times to get back to the left border.
Note: You can also use VBA code to change the alignment of a cell.
Indent Cells in Google Sheets
Unfortunately, in Google Sheets, you don’t have an option to indent cells, but you can use the custom number format as a workaround. To do this, follow the next steps.
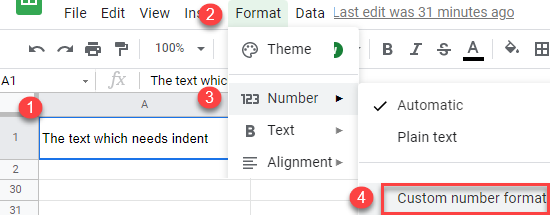
- Select a cell that you want to indent, and in the Menu, go to Format > Number > Custom number format.
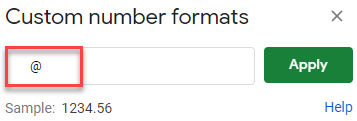
- In the format box enter as many spaces as you need (in this example 5 spaces), type @, and click Apply.
As a result, the cell now has an indent.
