Data Validation – Date / Time Format in Excel & Google Sheets
Written by
Reviewed by
This tutorial demonstrates how to use data validation to restrict entry to a date or time format in Excel and Google Sheets.
In this Article
Data Validation for Dates
Using data validation in Excel, you can restrict the entry of data into certain cells to ensure a user can only enter dates. You can further restrict the range of dates by setting minimum and maximum date values.
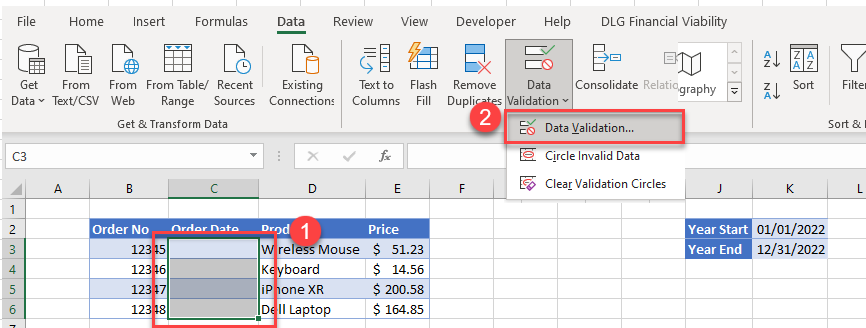
- First, select the cells where you want the data validation rule applied, and then in the Ribbon, go to Data> Data Validation > Data Validation.
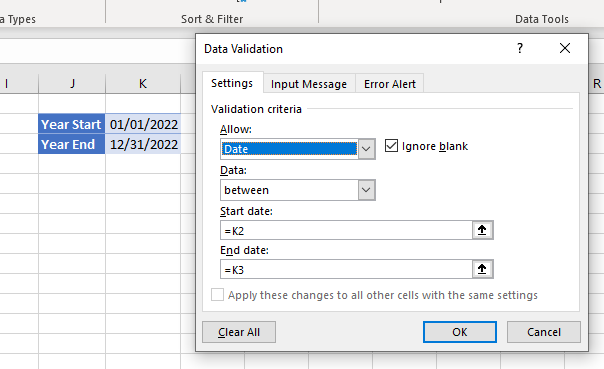
- In the Settings tab, set the Validation criteria. Set Allow to Date and from the Data drop down, choose between. Then link the cells with your Start date and End date in the bottom two fields. (Optionally, type in constant start and end dates not linked to cells.)
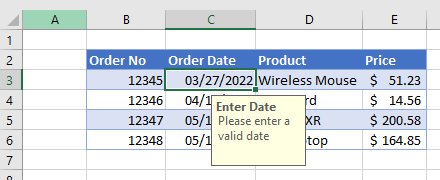
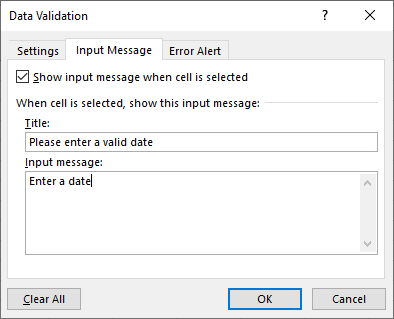
- Next, click on the Input Message tab and tick Show input message when cell is selected. Type in a Title and a message. This is the message that will pop up as a ToolTip when you click on a cell with an input message set up.
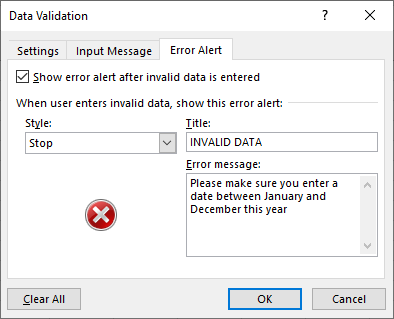
- Finally, click on the Error Alert tab. Tick Show error alert after invalid data is entered, and then choose a Style for the alert. Choose between Stop, Warning, and Information. Type in a Title and Error message, and then click OK.
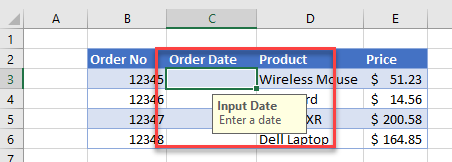
Now, when the cells where the validation is active are highlighted, the input message shows up.
If you try to enter any other type of data, or an invalid date type (e.g., a date formatted as text), your error message appears.

Dates as Serial Numbers
An exception is that you can type in the date as a serial number.
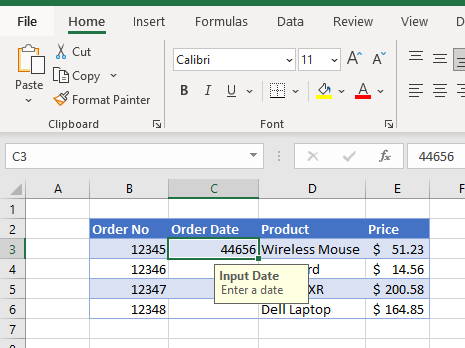
If your cell is formatted as the General number type instead of a Date format, you can still enter a valid date serial number. It’s shown in the cell that way when you press ENTER.
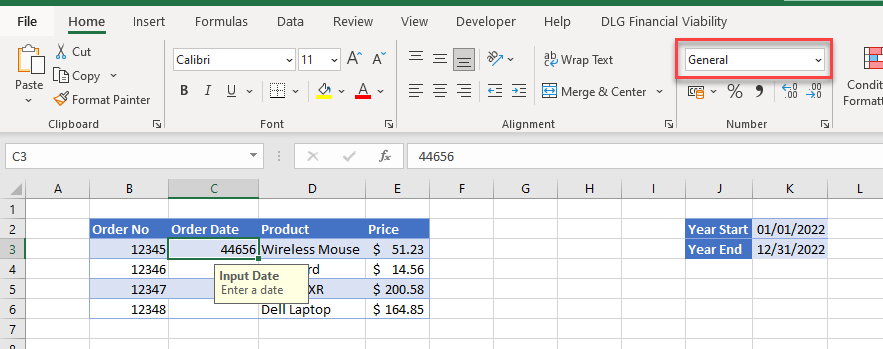
If you then format the cell as a date, the serial number displays as its associated date.

Note: If you do not want to restrict start and end dates in Excel – just that the values are in the right format – put in start and end dates that are wide apart, such as 01/01/1900 and 01/01/2300 – this effectively allows the user to enter any valid date.
Data Validation for Time
You can also restrict the values typed into a cell to certain times rather than dates.
- Highlight the cells where you wish to apply the data validation rule, and then in the Ribbon, go to Data > Data Tools > Data Validation > Data Validation.
- In the Settings tab, from the Allow drop down, choose Time. Then choose between from the Data drop down and set Start and End times.

- Add an Input Message and/or Error Alert, and then click OK to apply the data validation rule.
If you then type in a time value that is not within the restricted range, or you enter data that is not in time format, you get an error.
In the example below, there’s a custom error alert (Please enter a time between 8am and 4pm). If you don’t set one up, the error message is generic (This value doesn’t match the data validation restrictions defined for this cell.).

As with dates, you can extend the start and/or end times to include all valid time values.

Date Format Data Validation in Google Sheets
You can set a data validation rule in Google Sheets to restrict entry in a cell to a date only. You cannot, however, test for whether a time is entered.
For dates, the major difference between Excel and Google Sheets is that, in Google Sheets, you don’t necessarily need start and end dates like Excel does.
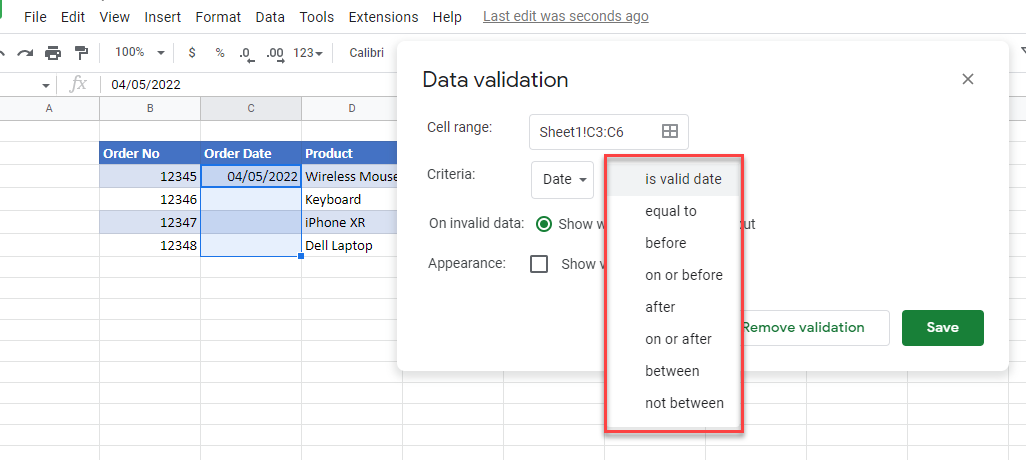
In the Menu, go to Data > Data validation. Then set Date as the Criteria drop down and choose from the available options (e.g., choose is valid date to restrict the entry to any date).
