Why is AutoSave Not Working or Grayed Out in Excel?
Written by
Reviewed by
This tutorial demonstrates why AutoSave might be grayed out or not working in Excel.
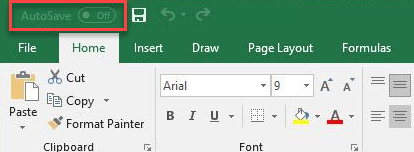
AutoSave is a new feature in Office365 that allows you to save your work in real time, meaning it automatically saves every few seconds as you work. To enable AutoSave, files must be saved to OneDrive or SharePoint.
If you are actually trying to fix AutoRecover, scroll down to the last section of this page.
AutoSave Not Working
AutoSave Feature Disabled
If AutoSave is not working, the first thing you should check is whether the feature is disabled in Excel Options. If it’s disabled, follow these steps to get it working:
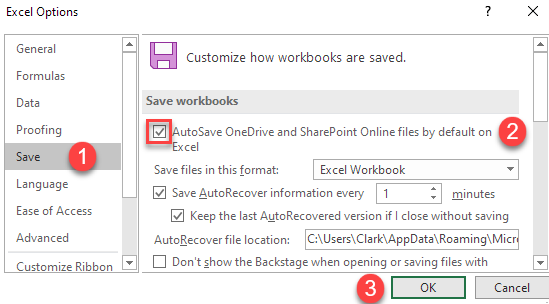
- In the Ribbon, go to File > Options.

- In the left-side menu of the Excel Options window, click Save, and then in the right-side menu, scroll down to Save workbooks.
Check the box next to AutoSave OneDrive and SharePoint Online files by default on Excel.
Click OK.
Not Saving Files to OneDrive or SharePoint
The AutoSave feature is available only if you are working on files that are saved on OneDrive or SharePoint. So, if you are working on an unsaved file, or on a file saved locally on your computer or offline, you won’t be able to turn AutoSave on. Try saving to OneDrive first.
Another possible reason why the AutoSave feature is disabled is because your file is in a local OneDrive folder and synchronization is paused or disabled. Make sure you are online and your files are syncing.
Corrupted File
If an Excel file is corrupted, AutoSave doesn’t work. Repair the corrupted file to fix the problem.
- In the Ribbon, go to File > Open > Browse.
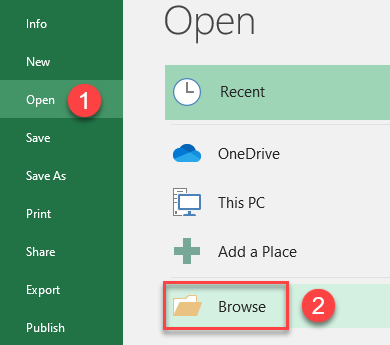
- Select the file you want to fix, and then click the Open button and choose Open and Repair…
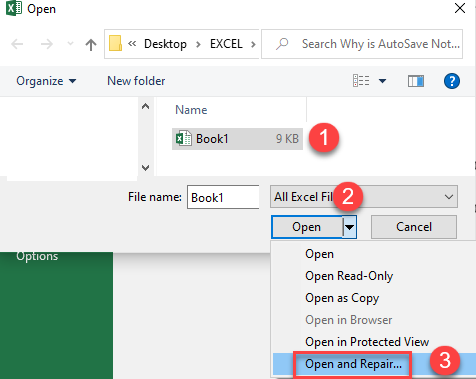
- A new window comes up with two options: to repair or to extract data. Choose to Repair to recover as much of your work as possible.

After clicking Repair, the window pictured below appears with repair information about your file. To finish with the process, click Close.
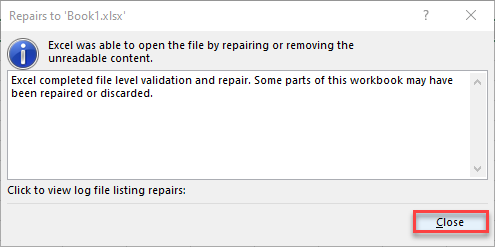
If the repair process didn’t fix the problem, choose to Extract Data.

Unsupported File Format
AutoSave is not supported in older formats such as .ptt, .doc, or .xls. To fix this, change the file extension to the latest. To check the file extension just look at the title bar, it should be .xlsx. If it is not, rename the file with that extension.

Security Features Turned On
Another potential reason AutoSave doesn’t work is because the workbook contains features that are not supported by it. You need to remove password encryption, remove restricted access, and also turn off sharing feature and turn off Refresh Data when opening.
There is a possibility that an add-in might have disabled the AutoSave feature, so you should turn add-ins off.
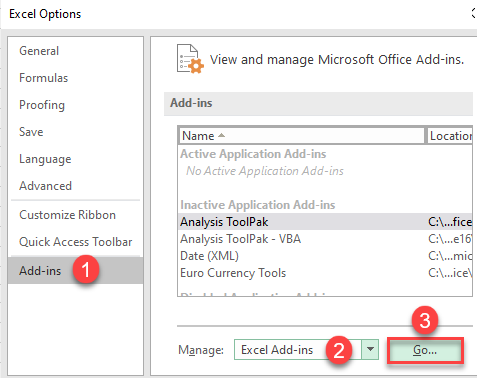
- In the Ribbon, go to File, and choose Options.

- In the Excel Options window go to Add-ins.
In the menu on the right side, choose to manage Excel Add-ins.
Click GO.
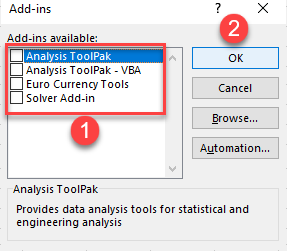
- In the Add-ins window, deselect all add-ins and click OK.
Repair or Reinstall Microsoft Office
If you tried everything above and nothing seems to work, consider repairing or reinstalling Excel. To repair the Microsoft Office installation, follow these instructions:
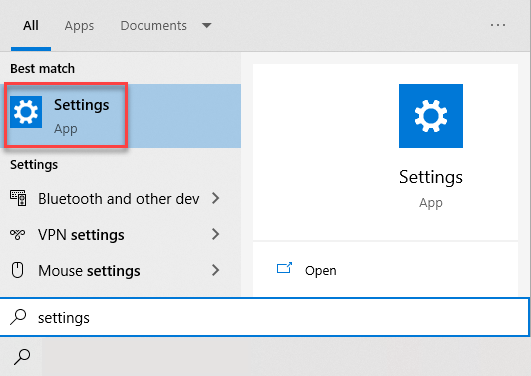
- In the search box on your Windows task bar, type Settings and open it. Or find Settings on your computer in another way.
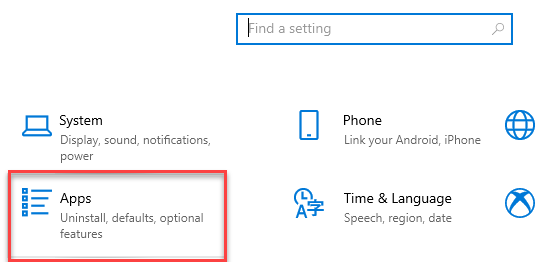
- In Settings, go to Apps.
- From the Apps & Features list, select the Microsoft Office module and click Modify.

- Choose Repair and click Continue.
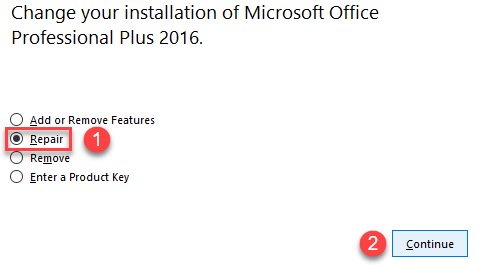
After this, your Microsoft Office installation is repaired.
The last option is to uninstall and then reinstall Microsoft Office to see if the AutoSave feature problem is still there.

AutoRecover Feature Not Working
AutoRecover is a feature in prior versions of MS Office (2003/2007/2010/2013/2016/2019) that automatically saves your work at regular intervals. (The default interval is 10 minutes, but you can adjust it.) AutoRecover keeps a temporary copy of your work and saves it every 10 minutes. It is even available when you save files offline or work on a file without saving it.
If AutoRecover is not working, you should see if it is disabled.
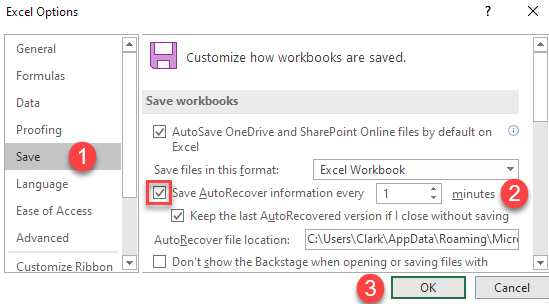
- In the Ribbon, go to File, and from the drop-down list, choose Options.

- The Excel Options window will open. In the left-side menu click on the Save and then in the right-side menu, scroll down to the Save workbooks section.
In it, check the box next to the Save AutoRecover information every 1 minute.
Click OK.
