AutoFill Numbers (Handle / Command) in Excel & Google Sheets
Written by
Reviewed by
This tutorial demonstrates a few ways to autofill numbers in Excel and Google Sheets.
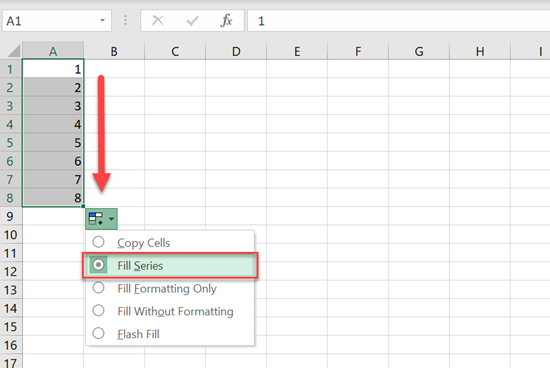
There are several options to automatically create a series of numbers in Excel. With your starting number in the first cell, you can drag or double-click the fill handle in the bottom right corner of the cell or use the Fill command in the Ribbon.
Dragging the Fill Handle
The first option is to drag the fill handle from the starting cell. For example, say you want to fill numbers 1–10 in Column A, starting from cell A1.
- First, enter 1 in the starting cell (A1) and position the cursor in the bottom right corner of the cell. When you do that, the fill handle appears.
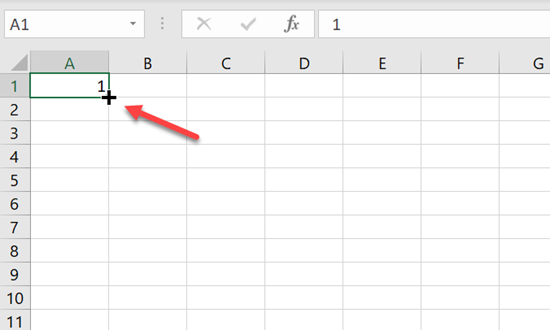
- After that, (1) drag the fill handle down depending on how many numbers you want to fill (in this case, 10).
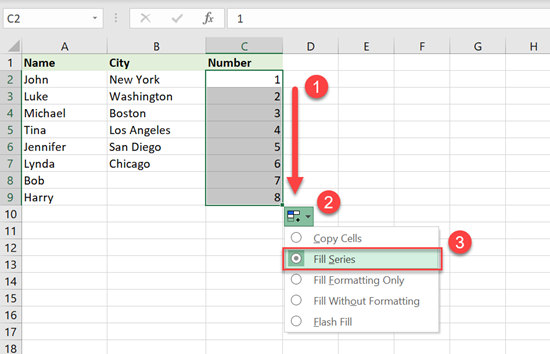
When you drop the cursor, the (2) AutoFill options button appears. Click on it and (3) choose Fill Series.
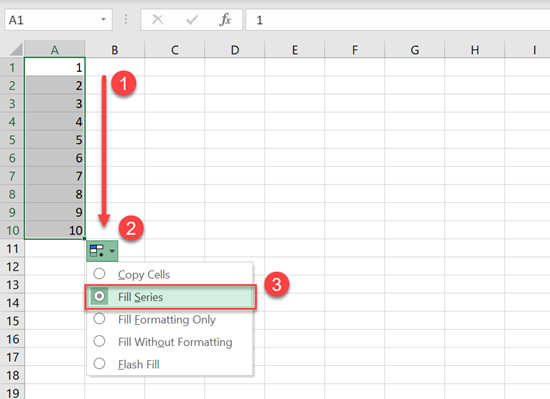
If you don’t choose this option, dragging will just copy the first value into all cells, because AutoFill doesn’t know the pattern of how to populate the cells based on only one value. You can enter two (or more) numbers and AutoFill will recognize the pattern and fill in the numbers based on that pattern.
Other Number Patterns
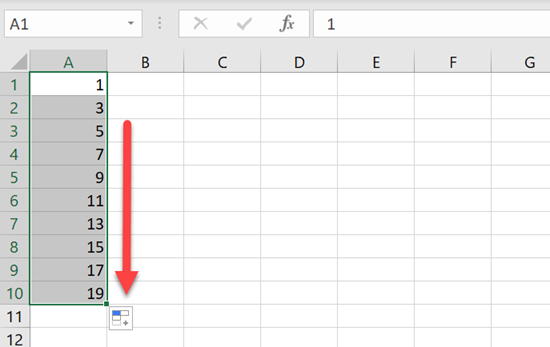
If you want to autofill a different pattern, like the first ten odd numbers, enter number 1 in cell A1 and 3 in cell A2. Then select both cells and drag the fill handle down to Row 10.
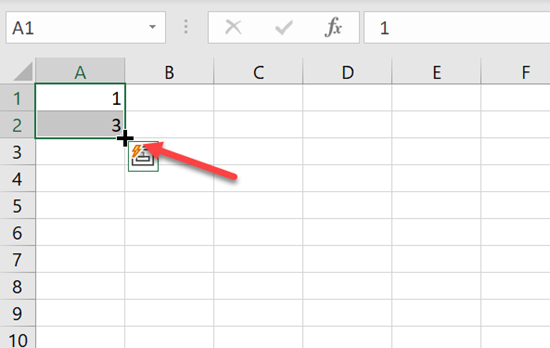
In this case, AutoFill recognizes the pattern and populates cells with odd numbers.
Double-Clicking the Fill Handle
Another option to autofill numbers in Excel is to double-click the fill handle. When you do this, Excel populates cells based on the adjacent columns (non-blank columns to the left and right from the selected column).
For example, in Column A below, you have data through Row 9 and, in Column B, through Row 7. And you want to autofill numbers starting from cell C2. In this case, Excel populates numbers through C9, because Column A is populated through Row 9.
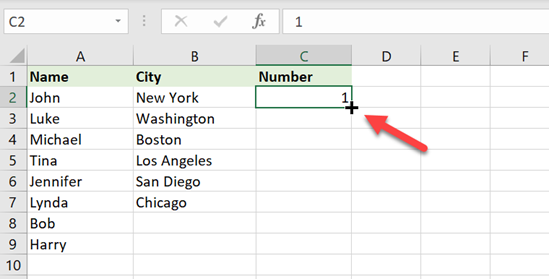
So, (1) select C2 and double-click the fill handle in the bottom right corner. Again, (2) click on AutoFill options and (3) select Fill Series. Then consecutive numbers are automatically populated through cell C9.
AutoFill Using Fill Command on the Ribbon
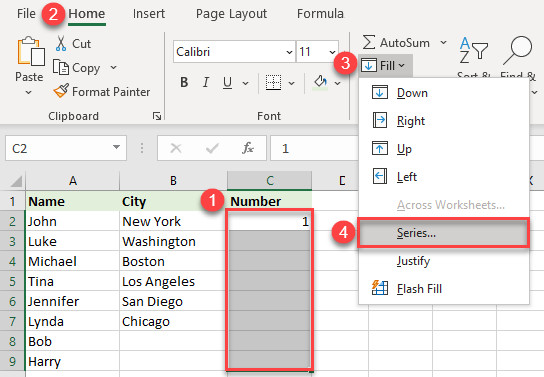
The above example could also be achieved using the Fill command on the Excel Ribbon. Select the range – including the initial value – where you want numbers to be populated (C2:C9). Then, in the Ribbon, go to Home > Fill > Series.
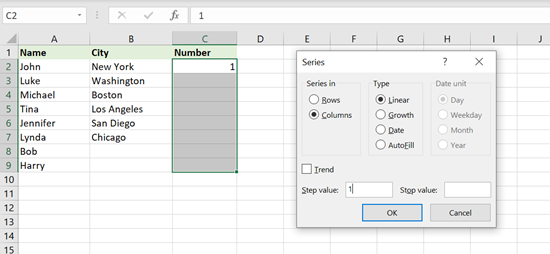
In the pop-up screen, leave the default values, as you need the column populated, and your Step value is 1.
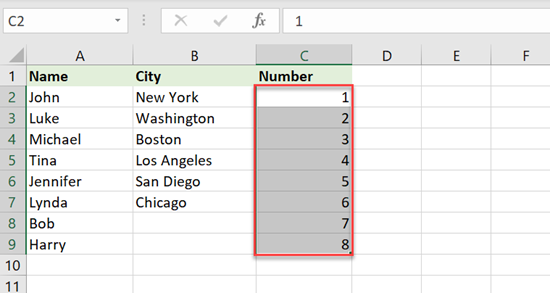
This way, you get the same output as with a double-click: Numbers 1–8 are populated in cells C2:C9.
With this option, you could also put step value 2, which means that numbers should increase by 2. Doing that, you could autofill odd numbers. You could also enter a stop value if you want the numbers to be filled up to a certain number.
AutoFill Numbers in Google Sheets
AutoFill functionality is available in Google Sheets, but it has some limitations compared to Excel:
- There is no Fill command on the Google Sheets Ribbon, so you’ll need to use the fill handle.
- There is no Fill Series option when you double-click the fill handle; you have to enter at least two values for Google Sheets to predict the pattern and populate numbers based on that. If you enter only one value, it will just be copied down the column.
- In Google Sheets, if you double-click the fill handle, it will populate rows based on a number of the rows in the first column to the left. (If you’re doing autofill in the first column, it looks at the first column to the right.)
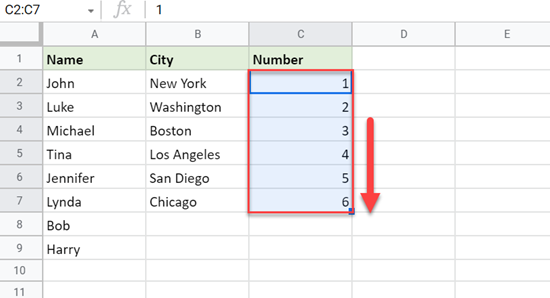
Let’s use the same example as above. So, enter number 1 in cell C2 and 2 in C3. Then select those two cells, and the fill handle appears in the bottom right corner.
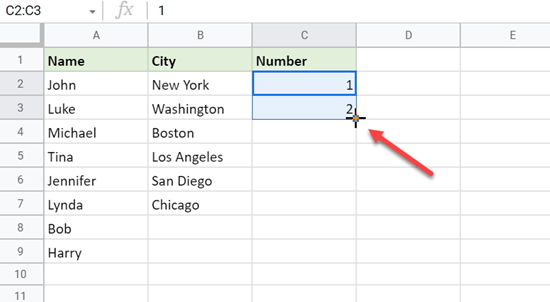
Now, double-click the fill handle or drag it down. When you double-click, AutoFill populates through C7, so if you want to populate through Row 9, you’ll have to drag it down the rest of the way.
