How to AutoFill Dates or Months in Excel & Google Sheets
Written by
Reviewed by
This tutorial demonstrates how to automatically fill a series of dates in Excel and Google Sheets.
Date Series
There are several options to automatically create a series of dates or months in Excel. With the starting date in the first cell, you can drag or double-click the fill handle in the bottom right corner of the cell or use the Fill command in the Ribbon.
Drag the Fill Handle to Fill Days
The first option is to drag the fill handle from the starting cell. Say you want to fill dates from 1/21/2020 to 1/30/2020 in Column A, starting from cell A1.
- First enter 1/21/2020 in the starting cell (A1) and position your cursor in the bottom right corner of the cell. When you do that, the fill handle appears.
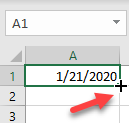
- Then, drag the fill handle down depending on how many dates you want to fill (in this case, 10).
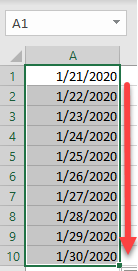
As you can see, Excel recognizes a date in cell A1, and automatically fills each cell with the next day, based on the starting date.
Other Date Intervals
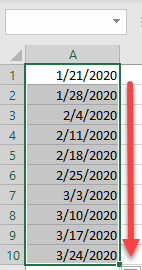
If you want to autofill a different date pattern, enter the first date in cell A1 and the second in cell A2. Then select both cells and drag the fill handle down to Row 10.
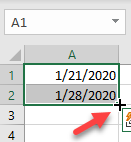
In this case, AutoFill recognizes the pattern (every seventh day) and populates cells with Tuesday dates.
Double-Click the Fill Handle
Another option to autofill dates in Excel is to double-click the fill handle. When you do this, Excel populates cells based on the adjacent columns (non-blank columns to the left and right from the selected column).
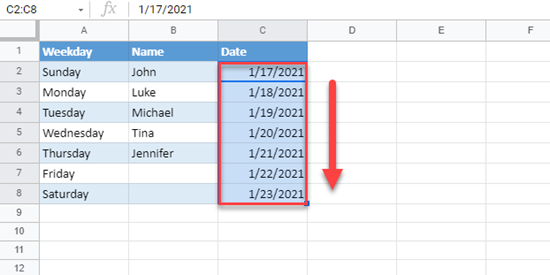
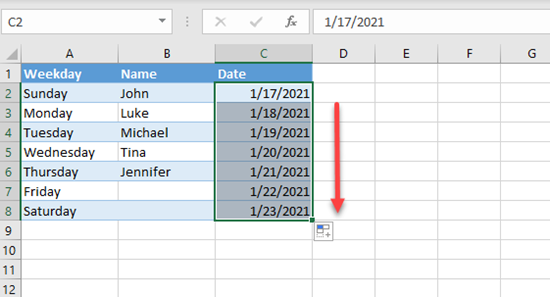
For example, in Column A below, you have data through Row 8 and, in Column B, through Row 6. And you want to autofill dates starting from cell C2. In this case, Excel fills dates through C8, because Column A is populated through Row 8. Select C2 and double-click the fill handle in the bottom right corner.
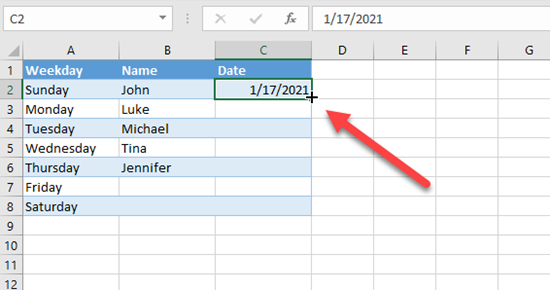
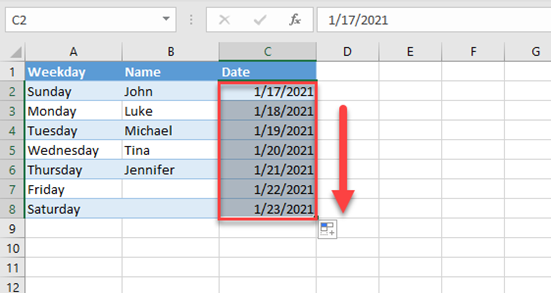
Excel automatically recognizes a date in cell C2 and populates consecutive dates through Row 8.
Fill Command on the Ribbon
The above example could also be achieved using the Fill command on the Excel Ribbon.
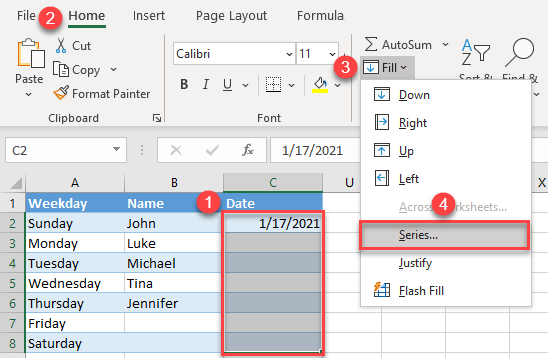
- Select the range of cells – including the initial value – where you want dates to be populated (C2:C8). Then, in the Ribbon, go to Home > Fill > Series.
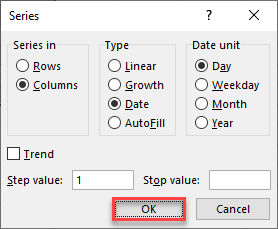
- In the pop-up screen, leave the default values, as you need the column filled. The Step value is 1 (1 day).
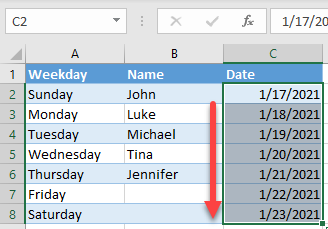
This way, you get the same output as with a double-click: Dates 1/17/2021–1/23/2021 are filled in cells C2:C8.
Autofill Months
Fill Handle
As shown in previous examples, Excel can recognize dates and populate consecutive days. Additionally, when Excel recognizes a date, it can automatically fill series of weeks, months, or years based on the initial value. If you want to autofill a certain date of each month based on an initial date, you can use the drag and drop fill handle. For example, you want the 21st of every month in a year to be populated in Column A. Let’s start with 1/21/2020 in cell A1.

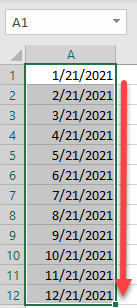
Then drag the fill handle to Row 12 to populate all 12 months of a year.
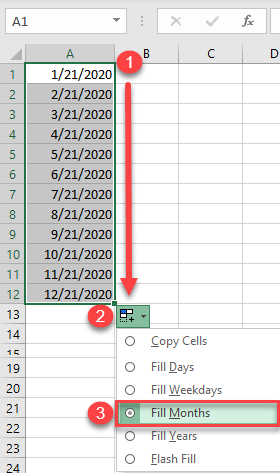
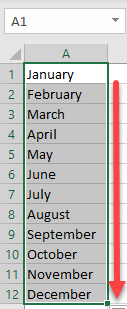
Similarly, you can autofill month names January–December, since the names of the months are a default custom list in Excel. Enter January in cell A1 and drag the fill handle down to Row 12.
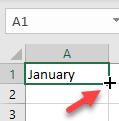
Excel automatically recognizes month names and populate cells accordingly.
Fill Command
You can also use the fill command on the Ribbon to populate a list of months. Select the range where you want months to be populated (C2:C9). Then, in the Ribbon, go to Home > Fill > Series.
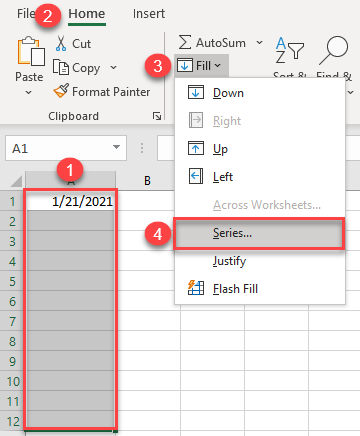
In the pop-up screen, Excel automatically recognizes the unit type as dates, select Month under the Date unit, and click OK.
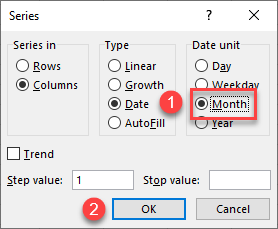
This way, you get the same output as with a double-click: The 21st of each month is populated in cells A1:A12.
Autofill Dates in Google Sheets
The AutoFill functionality is available in Google Sheets, but it has some limitations compared to Excel:
- There is no Fill command on the Google Sheets Ribbon, so you’ll need to use the fill handle.
- In Google Sheets, if you double-click the fill handle it fills rows based on the number of rows in the first column to the left. (If you’re using AutoFill in the first column, it looks at the first column to the right.)
Let’s use the same example as above. Enter 1/27/2021 in cell C2. Then select this cell, and the fill handle appears in the bottom right corner.
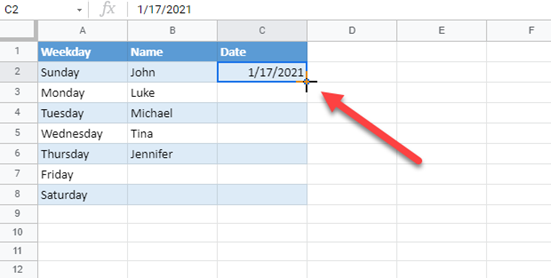
Now double-click the fill handle or drag it down. When you double-click, AutoFill populates through C6, so if you want to fill through Row 8, you’ll have to drag it down the rest of the way.
