Apply and Change (Slice) Theme in Excel & Google Sheets
Written by
Reviewed by
This tutorial demonstrates how to use themes to apply and change formatting in Excel and Google Sheets.
Apply a Theme
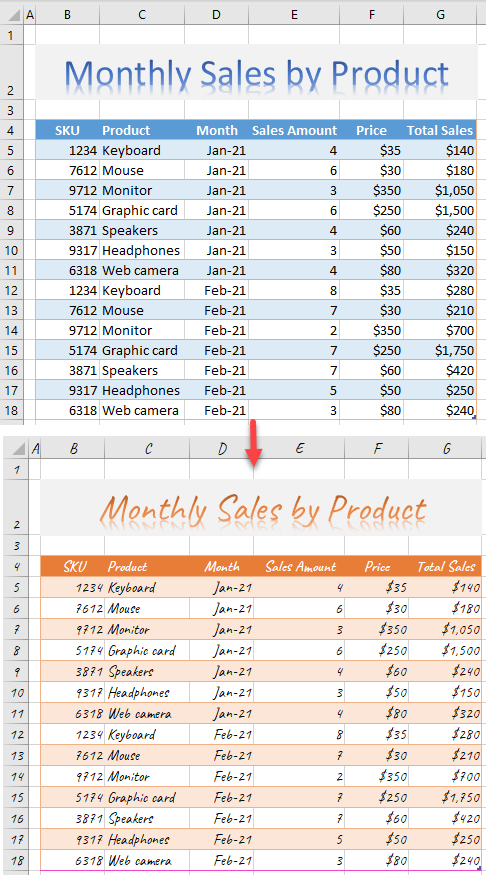
Excel, like the rest of Microsoft Office, uses themes to change the look of a workbook. Applying a new theme changes formatting such as font family, size, and color; cell background color; and emphasis (bold or italic). By default, the theme in Excel is Office.
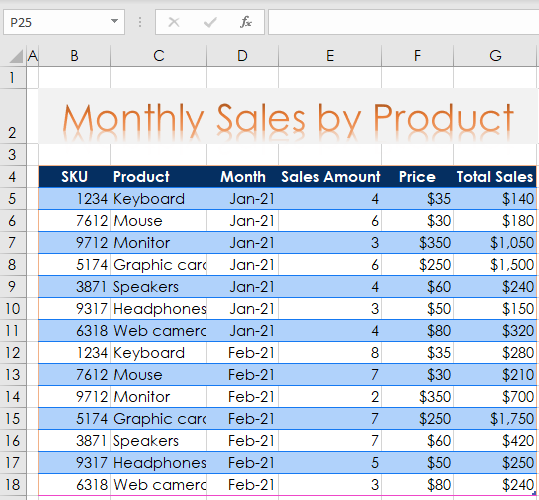
Say you have the data below – with the Office theme automatically applied – in a file, and you want to apply a different theme.
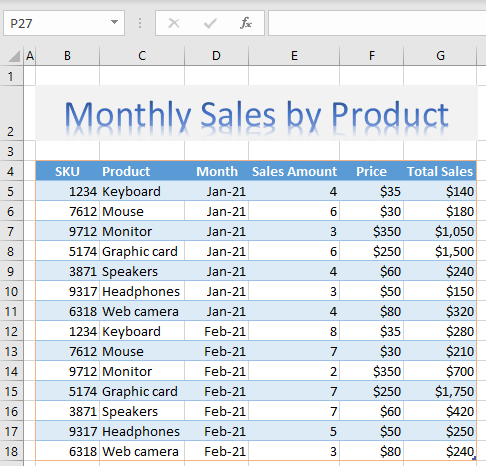
Data is formatted in a blue styled table, and the title is Word Art in blue font. All fonts are Calibri by default. Change this theme to some other theme offered in Excel.
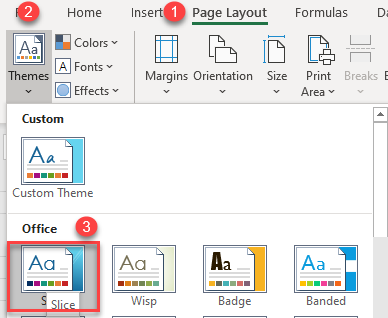
► In the Ribbon, go to Page Layout > Themes and choose a theme (e.g., Slice).
Applying the Slice theme changes the cell, object, and table formatting. The font is now Century Gothic, the Word Art font color is orange, and the table background colors are different shades of blue than they were using the Office theme.
Change a Theme
Of course, you’ll almost always need to change at least one setting to get the desired layout. Therefore, Excel allows you to change a predefined theme. You can change elements like the color scheme and font family.
Change the Color Scheme
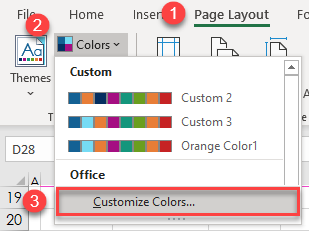
- In the Ribbon, go to Page Layout > Themes > Colors > Customize Colors.
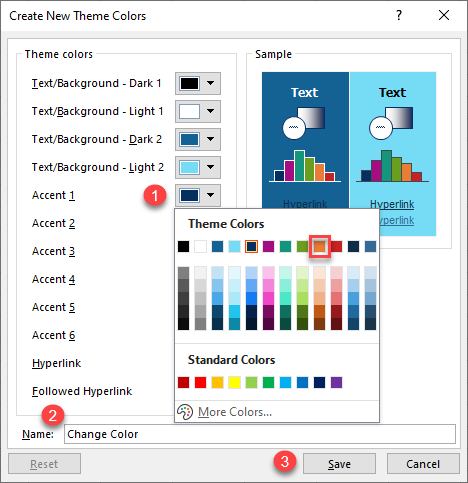
- In the Create New Theme Colors window, change the colors of different elements. Changing Accent 1, for example, changes the look of the table.
First, choose a color for Accent 1 (e.g., orange). Then give a Name to the adjusted color scheme (e.g., Change Color) and press Save.
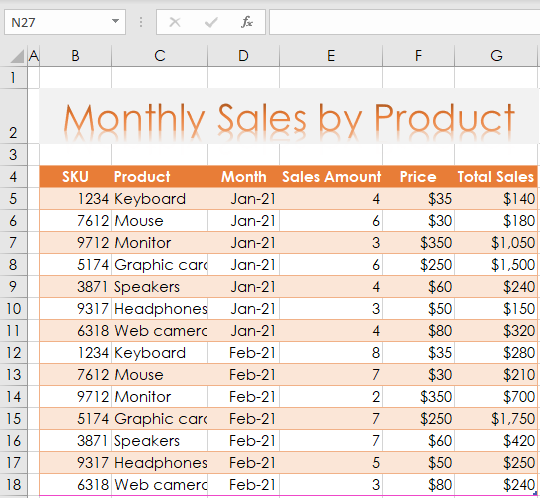
After this, colors in the whole workbook are adjusted according to these changes. As you can see in the picture below, the table colors are changed from blue to orange.
Change Font
In a similar way, you can also change the fonts of a theme.
- In the Ribbon, go to Page Layout > Themes > Fonts > Customize Fonts.
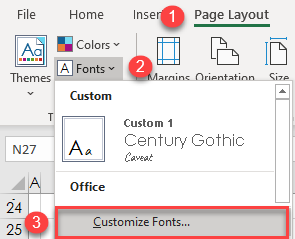
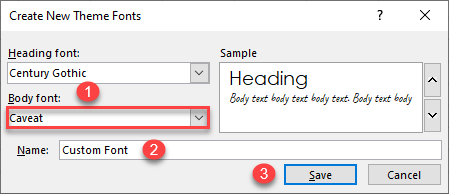
- In the pop-up window, set up a font for heading or body text. For this example, set the Body font to Caveat. Now give a Name to the modified font settings (e.g., Custom Font) and Save it.
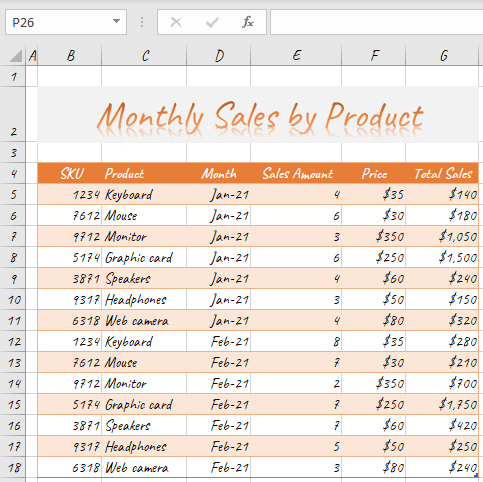
You can see in the picture below how the color and font changed according to the theme customization.
Save Custom Theme
If you want to use the adjusted theme later and/or in other Excel workbooks, save it as a custom theme.
- In the Ribbon, go to Page Layout > Themes > Save Current Theme.
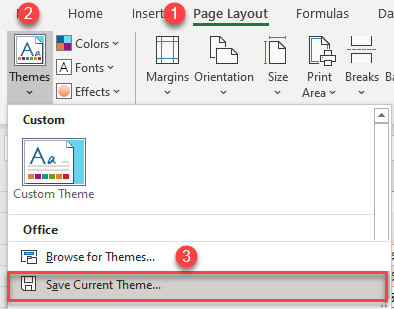
- In the pop-up Save window, choose a name for the custom theme (e.g., Custom Theme). Themes are saved with the .thmx extension.
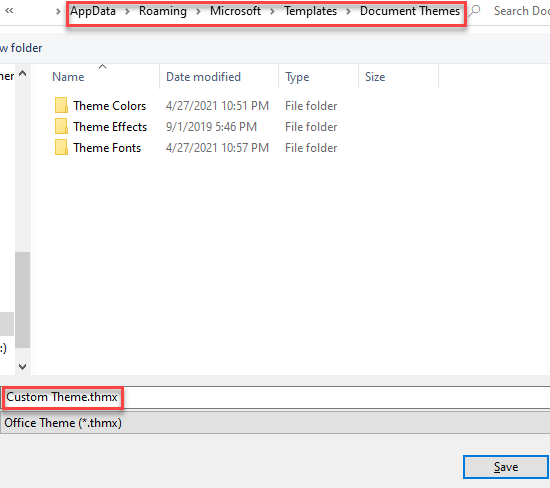
- By default, themes are saved in the folder with Microsoft Document Themes and can be used in all Excel workbooks in the future.
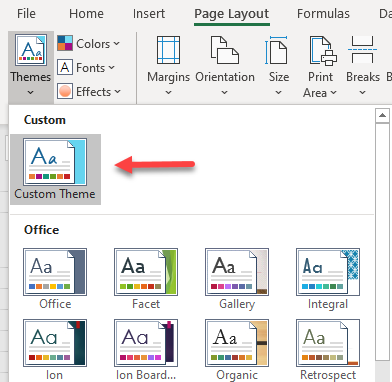
If you later go to apply a theme (Page Layout > Themes), you’ll see that now there is a Custom section with the new Custom Theme offered.
Change Themes in Google Sheets
You can also change and adjust the theme in Google Sheets.
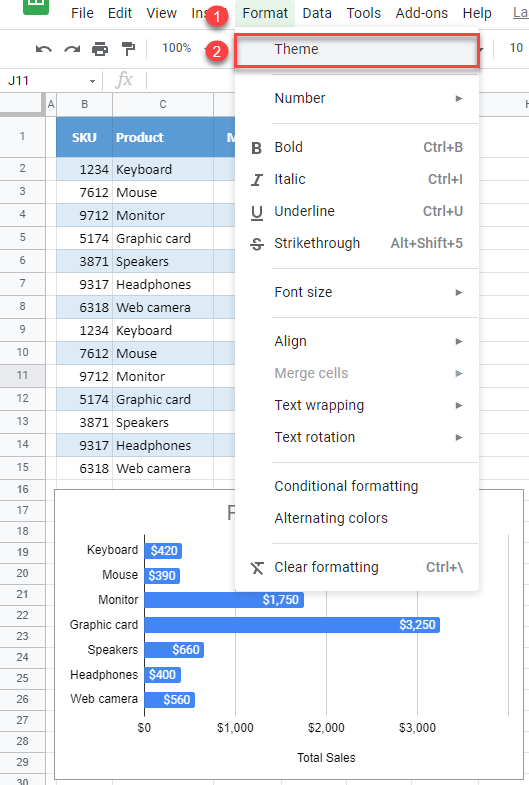
- In the Menu, go to Format > Theme.
- On the right side of the screen, choose a theme.
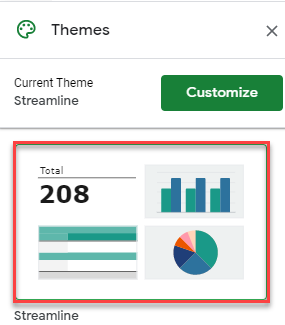
The theme change is automatically applied to any charts or other objects/elements.
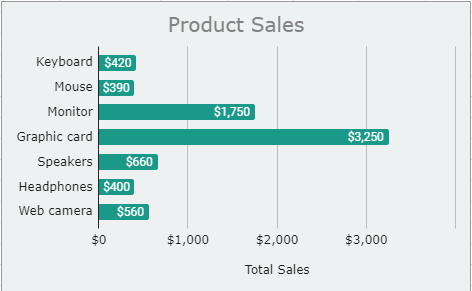
Customize Google Sheets Themes
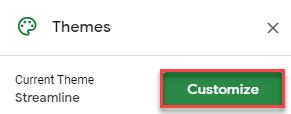
- Click Customize in the Themes window to change the default theme.
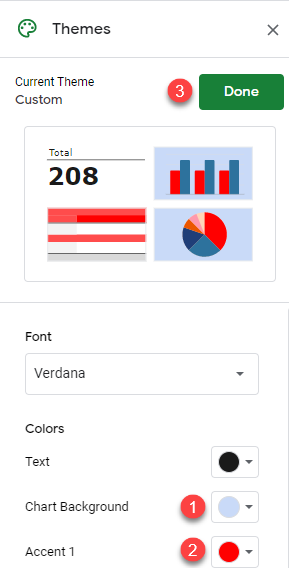
- Now you can change font style, chart backgrounds, and text. Change Chart Background color to light blue, then change Accent 1 to red, and click Done.
As a result, the customized theme is applied to the Google Sheets chart.
